
Most people go looking for this because the tub drains slowly, the stopper is stuck, or the drain finish is chipped and ugly. The good news is that the part you can see is held in by a screw, a thread or a single pin, and none of it requires opening a wall.
To remove a bathtub drain, first figure out which stopper you have and take that off. Then, only if you are replacing the drain itself, unscrew the round flange counterclockwise with a drain key. Most stoppers come out in under five minutes with a screwdriver or your fingers.
How do you remove the drain from a bathtub?
A bathtub drain comes out in two separate stages, and most people only need the first one.
Stage one is the stopper. That is the part that moves up and down to hold water. It sits on top of the drain and is held by a screw, a thread, or a pin.
Taking it off gives you a clear view into the drain, which is all you need to pull out hair or check why the tub will not hold water.
Stage two is the flange. The flange is the round metal ring at the bottom of the tub that the stopper sits in. It screws into a fitting under the tub. You only remove it if you are replacing the drain, fixing a leak at the drain, or swapping an old finish for a new one.
Here is the short version of the whole job:
- Identify your stopper type using the next two sections.
- Remove the stopper the way that type comes out.
- If needed, remove the overflow plate, the round cover on the end wall of the tub.
- If replacing the drain, unscrew the flange with a drain key and clean off the old putty.
You do not need to shut off the water for any of this. The drain is not under pressure. Lay a towel in the tub so a dropped screw does not chip the finish or disappear down the opening.
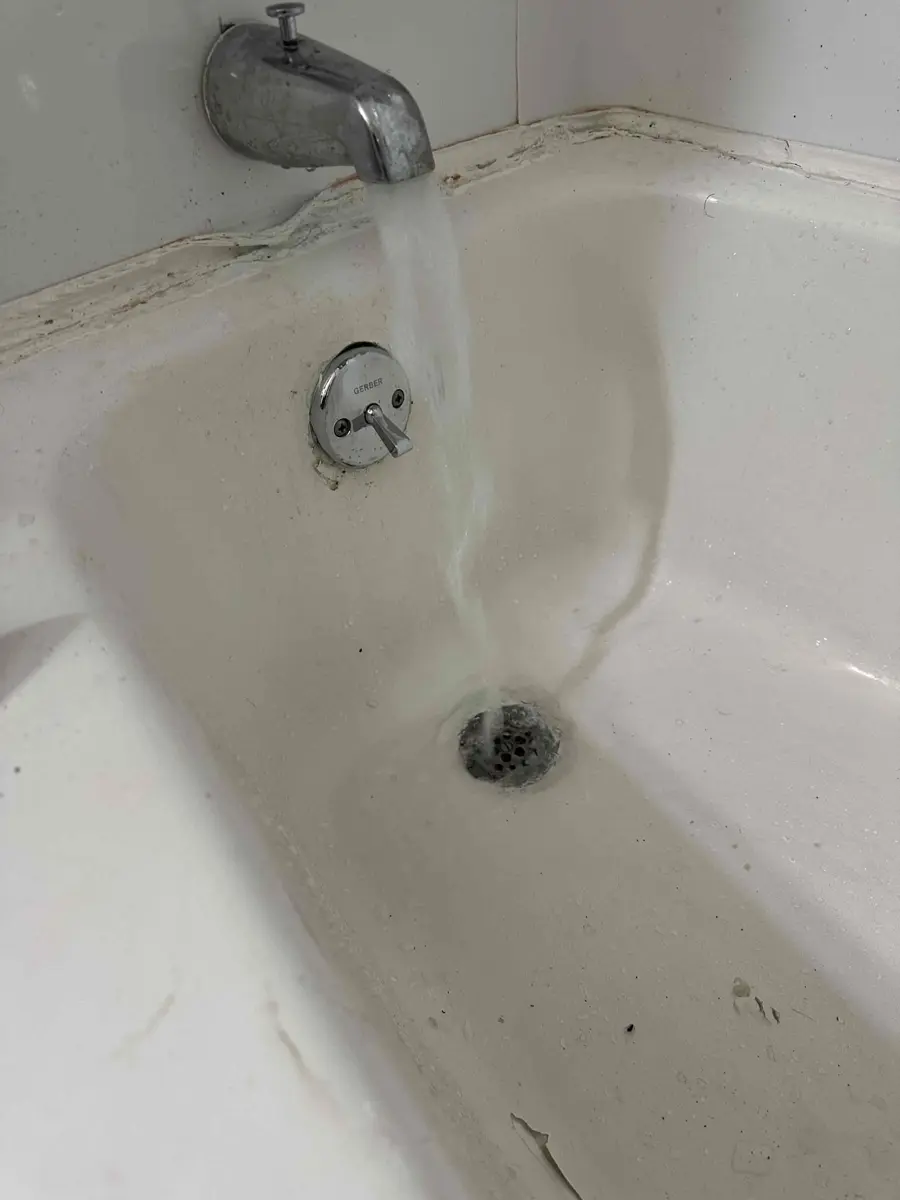
This tub has a trip lever stopper: the lever on the overflow plate does the work, and the drain itself only has a strainer. On this kind of tub, you remove the overflow plate first, not anything in the drain. That one detail saves a lot of frustration.
What are the parts of a bathtub drain?
Before you start turning things, it helps to know what you are looking at. A standard tub drain has five parts. Plumbers call the whole set the "waste and overflow."
- Stopper. The cap or plug that opens and closes the drain.
- Flange. The round metal ring you see in the tub floor. Some older flanges have a cross shaped set of bars across the opening.
- Drain shoe. An elbow shaped fitting under the tub that the flange screws into. You cannot see it from inside the tub.
- Overflow plate. The round cover on the end wall under the spout. Behind it is a hole that keeps the tub from spilling over if you leave the water running.
- Linkage. On trip lever tubs only, a rod that runs down from the overflow plate and moves a plunger or a stopper.
Below the tub, the drain shoe and the overflow pipe meet at a tee, then run to a trap. The trap is a curved section of pipe that holds a little water to keep sewer gas out of the bathroom.
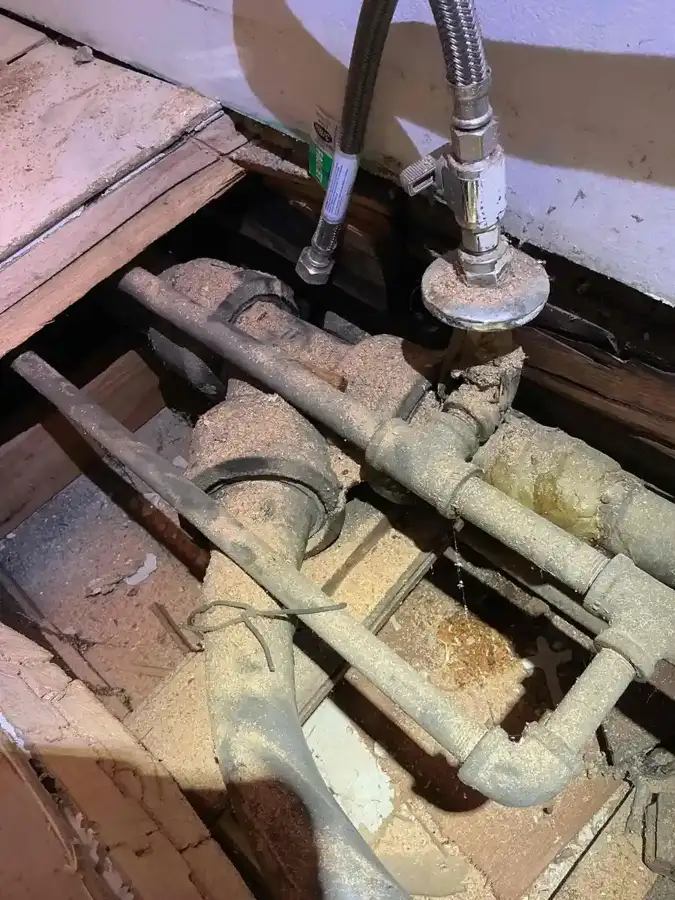
This is what sits under every tub: the drain shoe, the overflow pipe and the trap below them.
We opened this floor on a job where the tub and bathroom sink drains were being repiped in PVC. You will never need to open the floor to remove a stopper, but it shows why a loose flange can leak into the room below.
The flange threads into the top of the drain shoe from inside the tub. The shoe is held in place under the tub. That is why you can unscrew the flange from above without touching anything below, as long as the shoe does not spin with it.
The overflow plate is held on by one or two screws into the overflow pipe behind it. If you take those out, the gasket behind the plate can drop into the wall. Hold the plate as you back the screws out.
How do I know which bathtub stopper I have?
There are six common stoppers. You can tell them apart by looking at the drain and the overflow plate, then pressing or turning the stopper.
Toe touch. A round cap you push down with your foot to close and push again to open. It clicks.
Lift and turn. A cap with a small knob on top. You lift it and twist to lock it open or closed. From above it looks almost exactly like a toe touch.
Push pull. A cap with a knob you pull up to open and push down to close, with no twisting.
Flip it. A stopper with a small lever on top that you flip from side to side. It sits in the drain on rubber rings and has no screw at all.
Pop up with trip lever. A metal stopper in the drain that rises and drops when you move a lever on the overflow plate.
Plunger style trip lever. Also has a lever on the overflow plate, but the drain only has a strainer. The plug that blocks the water is hidden inside the overflow pipe.
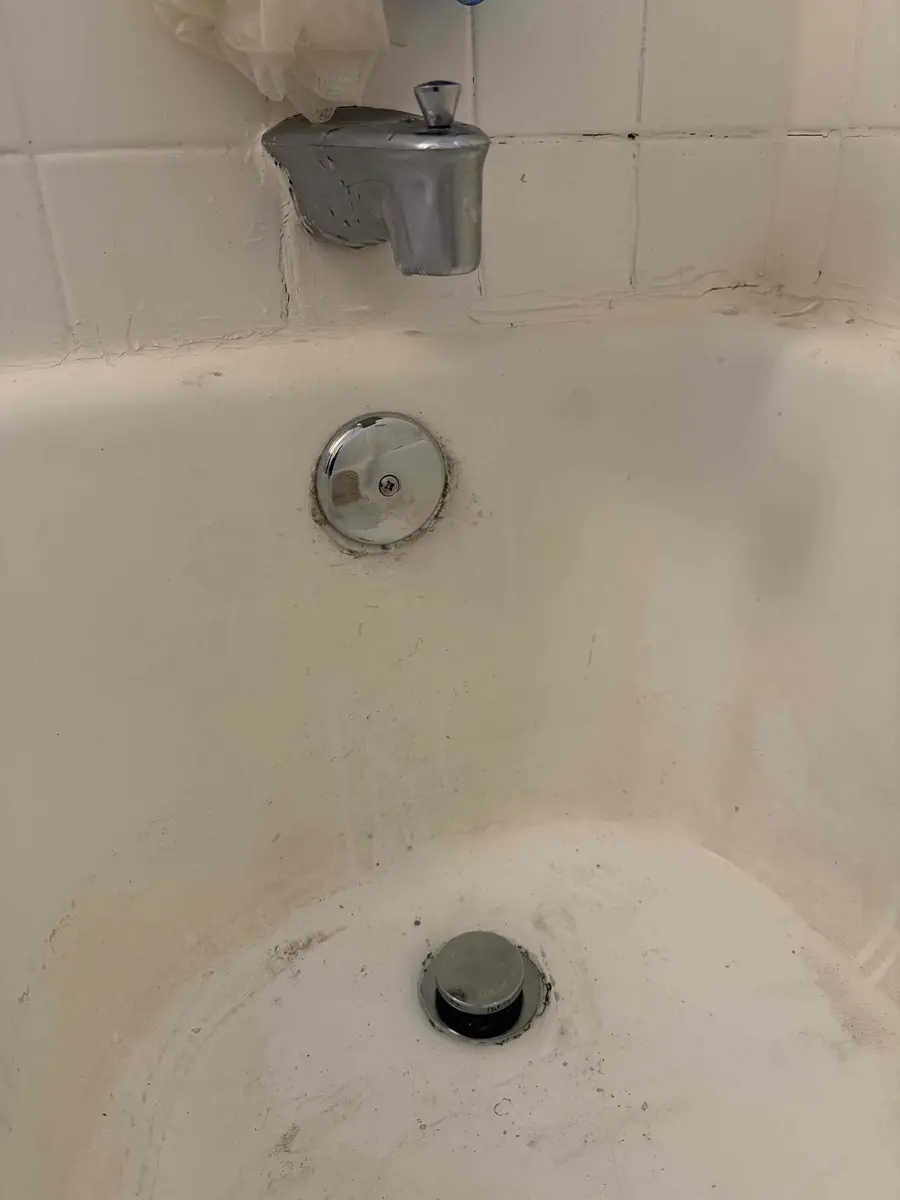
A cap stopper with a plain overflow plate means the stopper itself is the whole mechanism. That makes it a toe touch, lift and turn or push pull, and all three come out from the top of the drain. This photo is from a tub that was draining slowly and backing up dirty water.
If your overflow plate has a lever on it, you have one of the two trip lever designs. If the overflow plate is a plain round cover with a screw in the middle, the stopper in the drain is the only moving part.
Still unsure? Lift the stopper as high as it goes and look underneath. A threaded post means toe touch or lift and turn. Rubber rings and no post means flip it. A rocker arm that disappears into the drain means pop up.
How do you remove each type of bathtub stopper?
Each type comes out a different way. Follow the steps for yours.
Toe touch stopper
Step 1: Open the stopper. Push it so it pops up to the open position. In this position you can grip the cap body.
Step 2: Unscrew the cap. Turn the cap counterclockwise by hand. If it will not budge, wrap it with a rag and use pliers gently. Some models have a cap that unscrews from a body underneath. In that case, unscrew the cap first, then remove the screw you see in the center, and lift the body out.
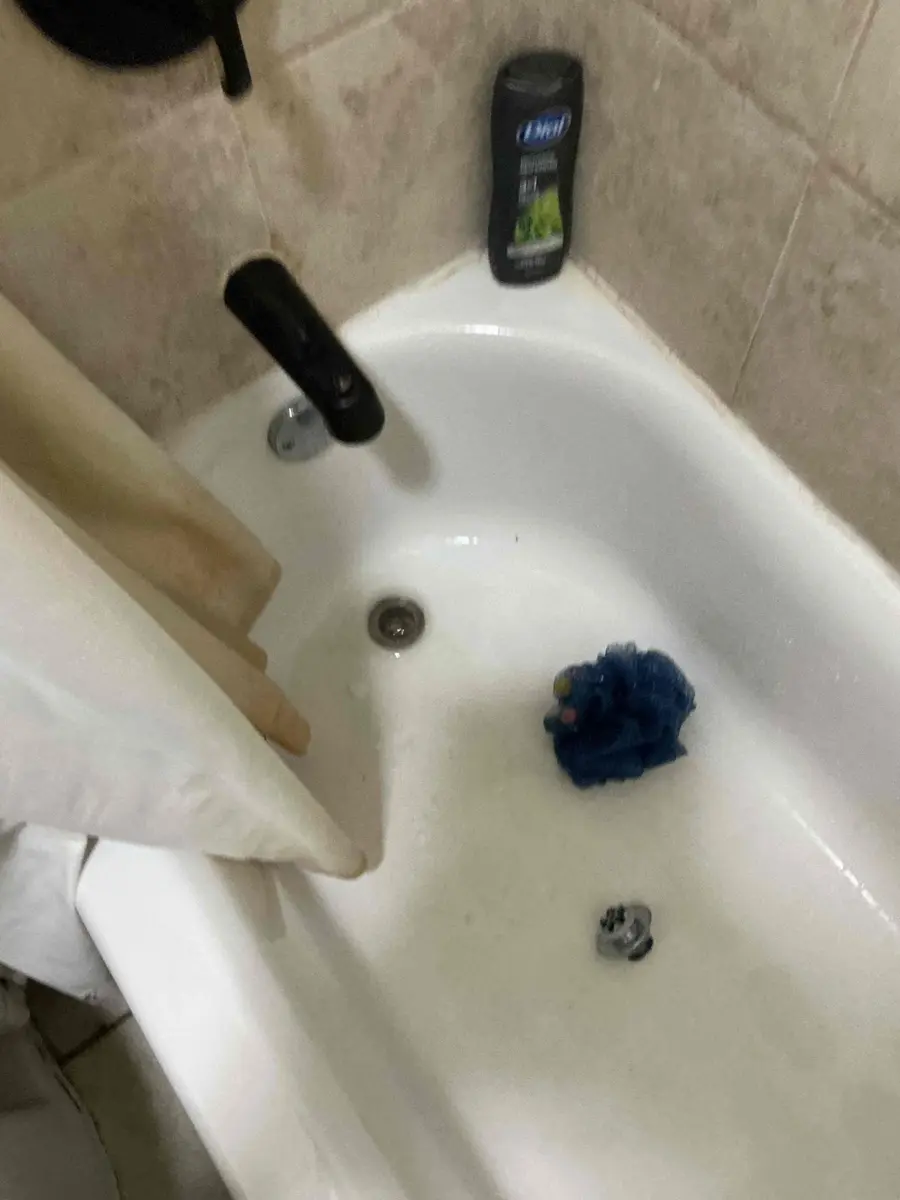
Once the cap is off, the drain is open and you can see the hair that slows most tubs down. This stopper was removed on a slow drain call, and the clog sat just below it. If your goal was clearing a clog, you may be done here.
Lift and turn stopper
Step 1: Open it and find the set screw. Lift the knob, turn it to lock open, and look at the side of the knob or under the cap. Many have a tiny set screw.
Step 2: Loosen and lift. Loosen the set screw with a small flat or Allen key screwdriver and pull the knob off. Then turn the stopper body counterclockwise and lift it out. If there is no set screw, simply unscrew the whole stopper counterclockwise while it is open.
Step 3: Remove the post. Under the stopper is a threaded post screwed into the crossbars of the drain. Unscrew it with a flat screwdriver.
We do not have a clean NSP job photo of a lift and turn knob with its set screw exposed, so this step has no photo. It is on our list of shots for technicians to capture.
Push pull stopper
Step 1: Hold the body. Pull the knob up to open. Hold the stopper body steady with one hand.
Step 2: Unscrew the knob. Turn the knob counterclockwise to take it off. Under it is a screw. Remove that screw and lift the stopper straight out.
Flip it stopper
Step 1: Lift and wiggle. Grab the stopper by its lever and pull straight up while rocking it side to side. The rubber rings let go with a firm pull. There are no screws.
Pop up stopper with trip lever
Step 1: Open the stopper. Flip the trip lever so the stopper is up.
Step 2: Pull the stopper and rocker arm. Grab the stopper and pull it up and toward the overflow side. A long rocker arm slides out of the drain with it. Clean the hair off the arm.
Step 3: Remove the overflow plate. Back out the two screws on the overflow plate and pull the plate, lever and linkage straight out of the overflow opening.
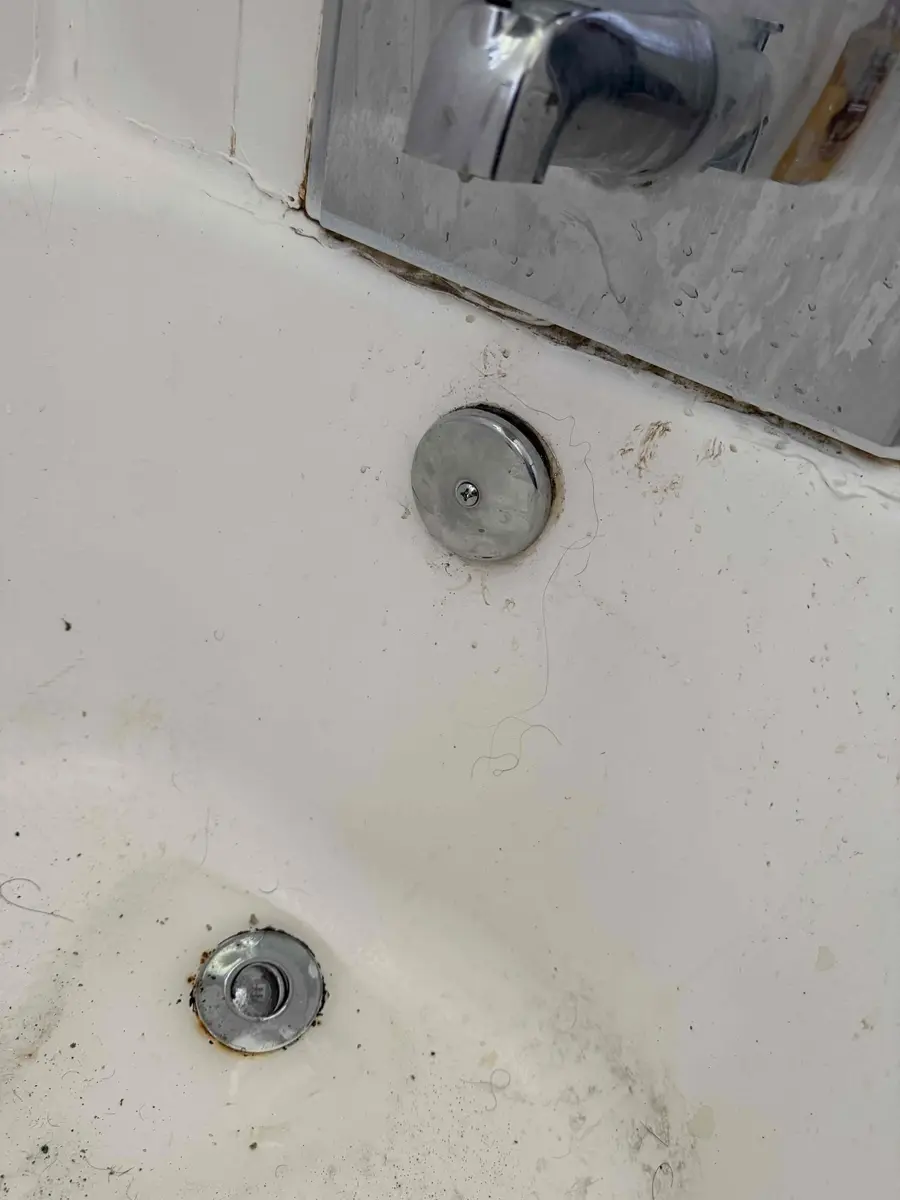
Two screws on the overflow plate are the only thing between you and the linkage. This photo is from a slow tub drain call, before the plate came off. Hold the plate while the second screw comes out so the gasket does not slip into the wall.
Plunger style trip lever
Step 1: Remove the overflow plate. Unscrew the two screws and pull the plate, lever and linkage out together. The plunger, a heavy brass or plastic cylinder, comes out on the end of the rod.
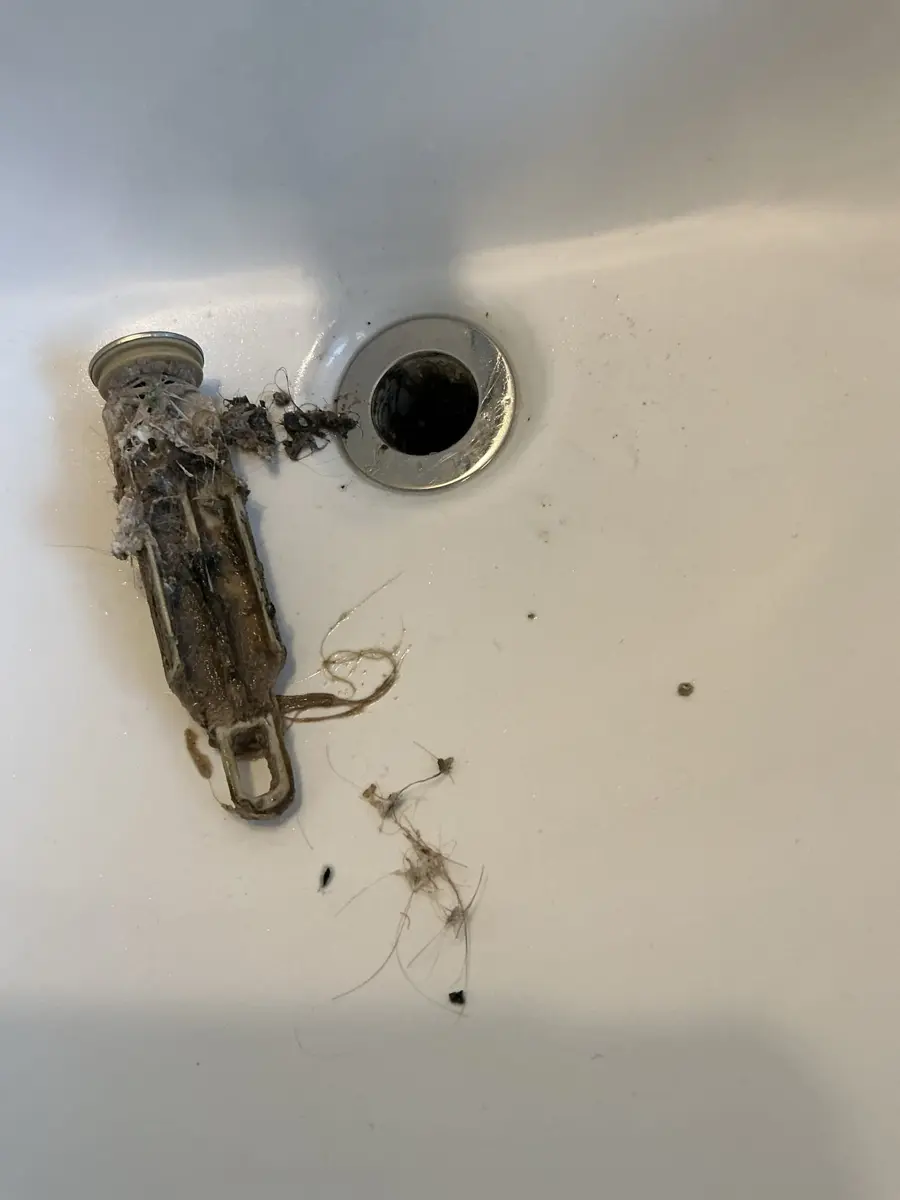
This is a plunger linkage wrapped in hair, pulled on a call where the tub and bathroom sink were both draining slowly. Pulling the linkage out of the overflow is the whole removal on this design. The strainer in the drain can stay in place unless you are replacing the drain.
Step 2: Clean the strainer. The drain strainer on these tubs is usually held by one center screw. Remove it to clean under it.
How do you remove the overflow plate?
On every type of tub, the overflow plate comes off the same way, and you will want it off before you replace a drain.
Step 1: Back out the screws. Most plates have one center screw or two screws. Use a flat or Phillips screwdriver, and hold the plate as the last screw loosens.
Step 2: Pull the plate straight out. On a trip lever tub, the linkage comes with it. On a plain plate, you will see the open overflow pipe and a rubber gasket.
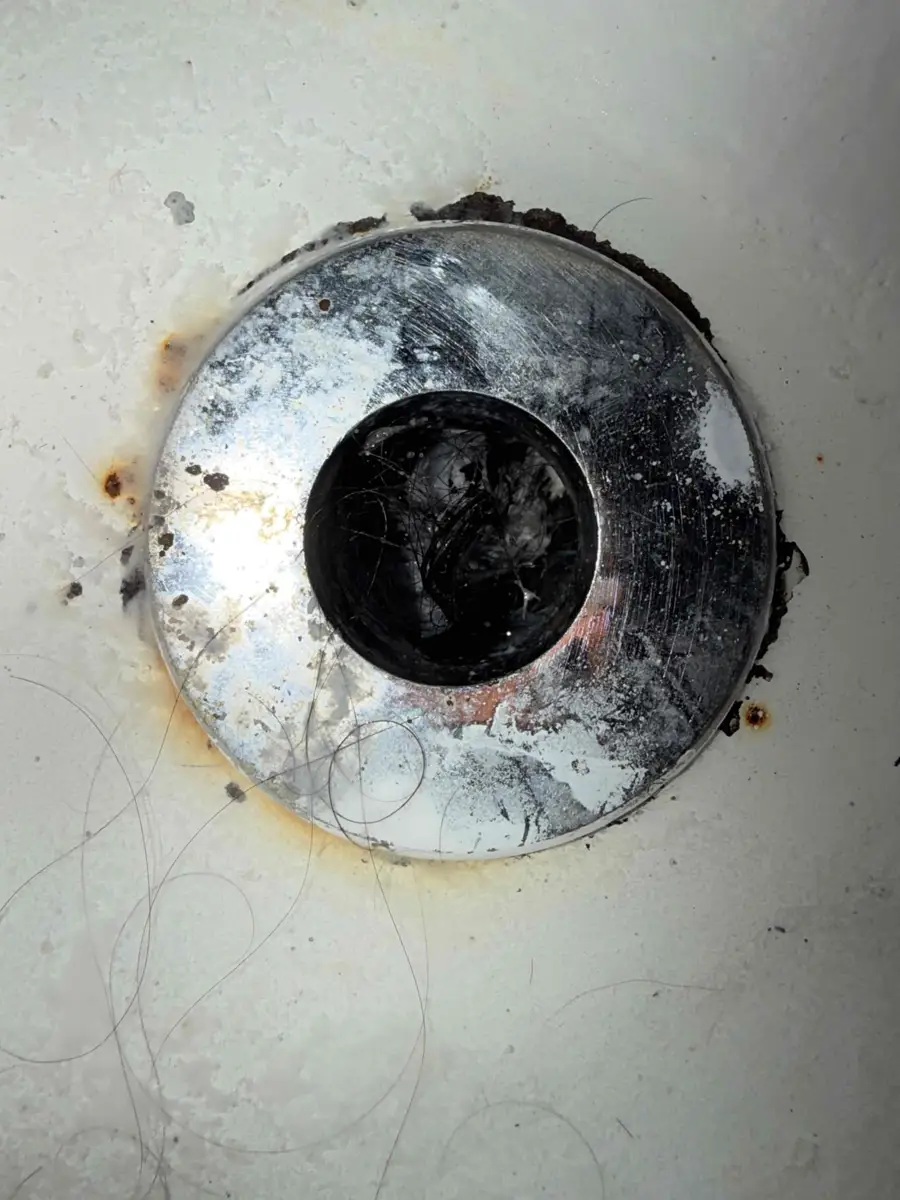
With the plate off, you are looking straight into the overflow pipe, and this one had hair packed in it. Hair here slows the drain just like hair in the stopper. Cleaning this opening is often as important as cleaning the drain itself.
Step 3: Check the gasket. The gasket is the foam or rubber ring between the overflow pipe and the back of the tub. If it is cracked or flattened, replace it. A failed gasket here is one of the most common causes of a leak under a tub that only happens when the tub is full.
Do not run a full bath while the overflow plate is off. Water will pour straight into the overflow pipe and, if the gasket is bad, down the outside of the pipe into the floor.
How do you unscrew the bathtub drain flange?
You only need this part if you are replacing the drain. If you just wanted to clear a clog, put the stopper back and stop here.
Step 1: Remove the stopper and crossbar parts. Take out the stopper using the section above. On a lift and turn or toe touch, remove the threaded post too.
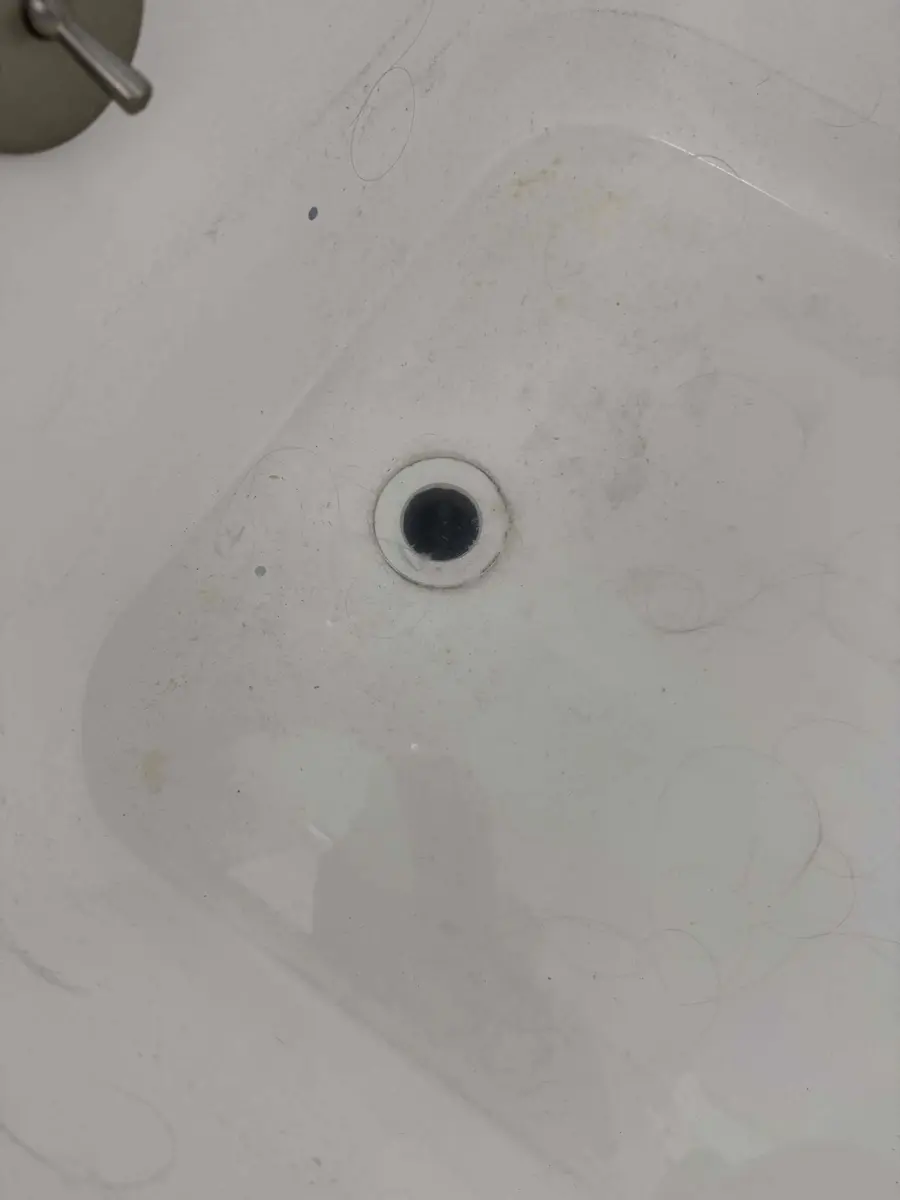
With the stopper out, you are looking at the flange: the ring that screws into the drain shoe below. On this tub the opening was clear, so the slow drain was further down. This is the point where you decide whether the flange is coming out or staying.
Step 2: Use a drain key. A drain key is an inexpensive hardware store tool that fits into the crossbars of the flange. Insert it, put a wrench or a screwdriver through the key's handle, and turn counterclockwise. Steady pressure works better than jerking.
We do not have a clean job photo of a drain key seated in a flange. It is on our list of shots to capture.
Step 3: If the crossbars are gone or broken, use the pliers trick. Insert a pair of needle nose pliers so the jaws press against the inside wall of the flange, then turn the pliers with a screwdriver through the handles. A tool called a drain extractor does the same job and grips better on a stripped flange.
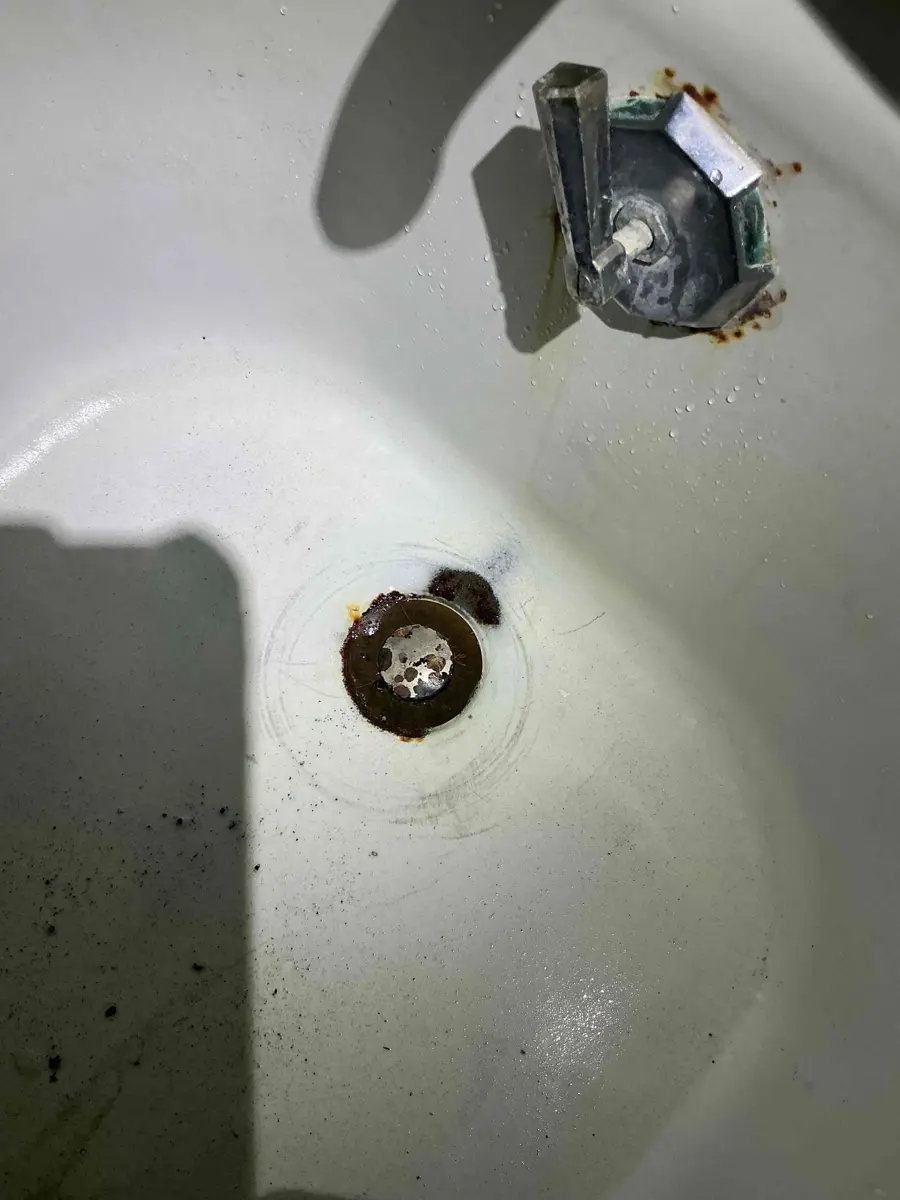
Corrosion like this means the flange may snap or strip before it turns. This homeowner called because the knob would not turn and the stopper would not come back up. On a drain this old, go slowly. If the crossbars break, switch to the extractor rather than more force.
Step 4: Clean the old putty. Once the flange is out, scrape the old plumber's putty or sealant off the tub with a plastic putty knife. Do not use a metal blade on an acrylic or fiberglass tub.
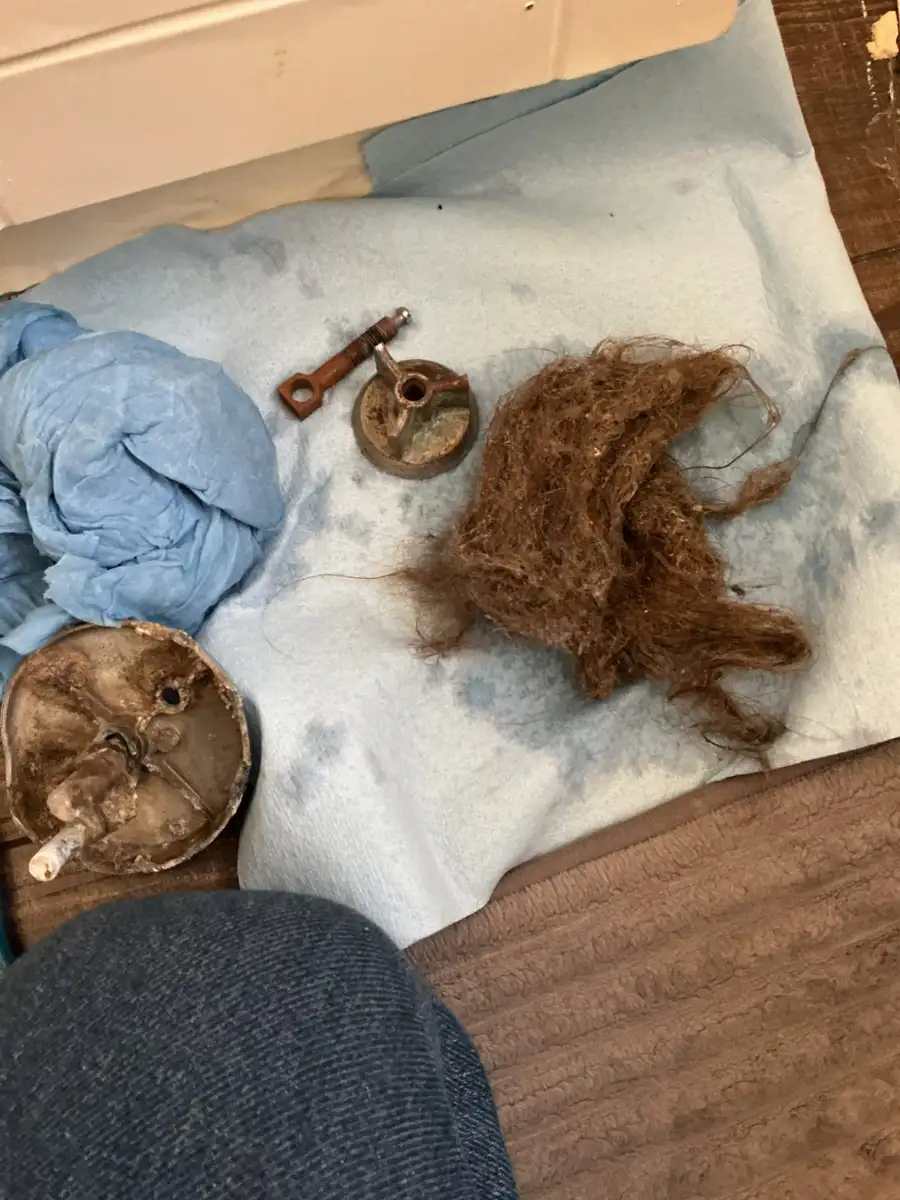
These are the parts that came out of one slow tub: the old cover, the drain pieces and the hair packed in around them. Seeing this much debris tells you the parts were overdue. It is a good moment to install a new drain rather than reuse corroded pieces.
What do you do when the drain shoe spins or the flange will not come out?
This is where most do it yourself drain jobs stall. When you turn the flange, the drain shoe underneath can turn with it. Nothing comes loose, and you can crack the shoe or break its seal with the tub.
If the shoe spins, someone needs to hold it from below. That means getting to the underside of the tub through an access panel behind the tub wall, from the basement ceiling, or from the room below.
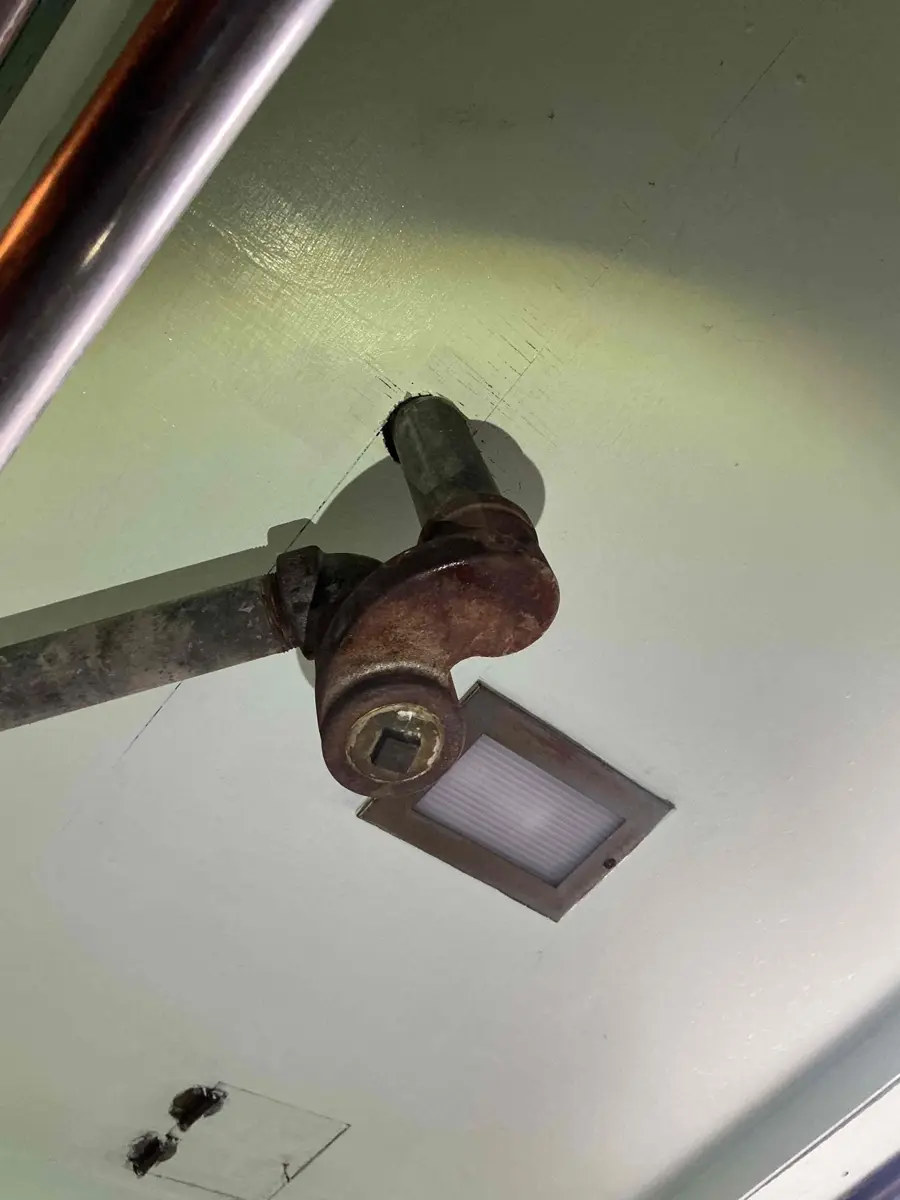
This is the drain shoe and trap seen from the ceiling of the room below. On this job the tub and shower were not draining after the homeowner tried a snake, a wet vac and a chemical drain cleaner. When the parts you need are only reachable from below, the job is no longer a five minute fix.
If the flange will not turn at all, decades of scale and corrosion may have fused the threads. Grand Rapids city water is moderately hard, which the city's 2025 water analysis puts at roughly 8 grains per gallon, and that mineral buildup locks threads over time. Penetrating oil and patience help more than force.
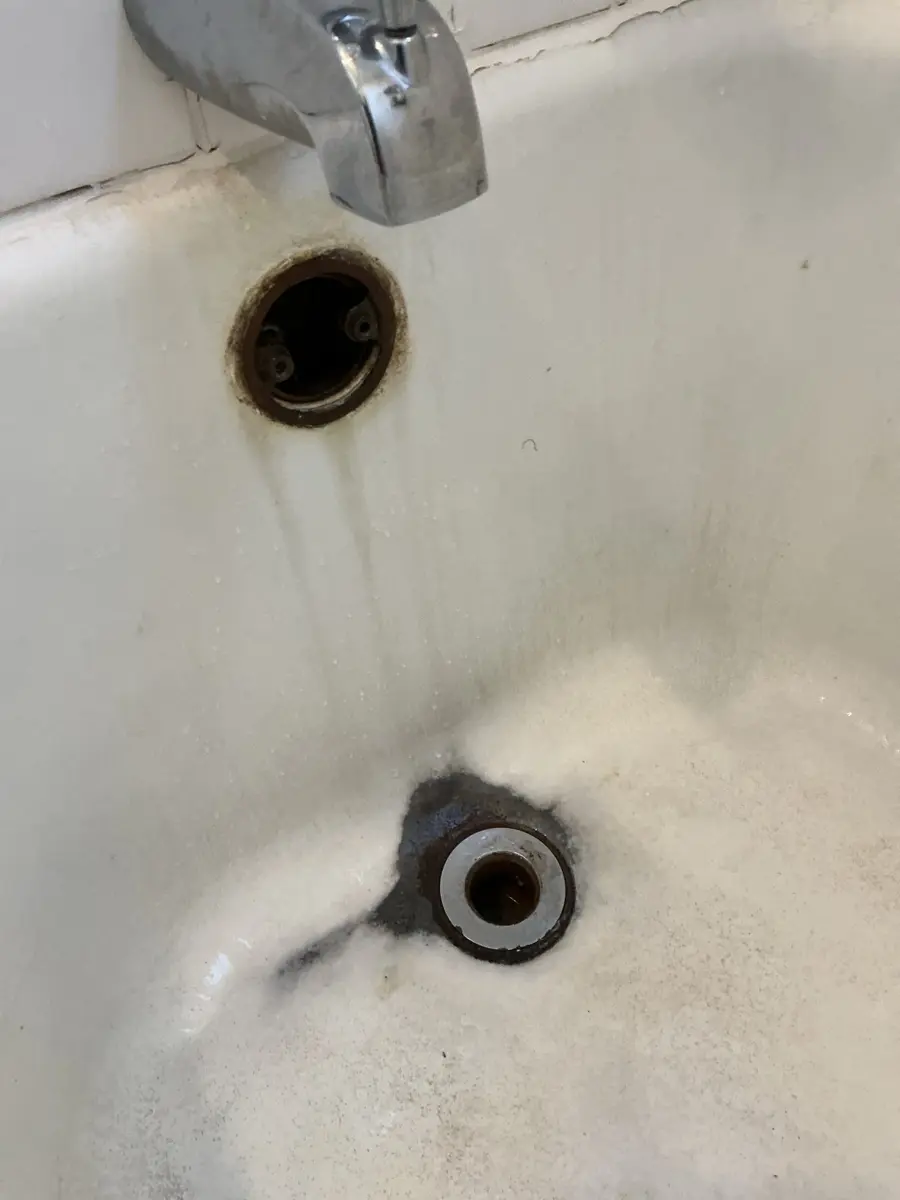
Rust rings around both openings on an old cast iron tub mean the parts behind them are just as worn. We opened this one on the same slow drain call as the hair photo above. On tubs this age, expect at least one part to break during removal.
Stop and call if you see any of these: the shoe is cracked, water stains on the ceiling below, the flange strips and nothing grips, or there is no way to reach the underside of the tub. Forcing it can turn a drain swap into a ceiling repair.
How do you install a new bathtub drain?
When you buy a new drain, match three things to the old one: the thread size of the flange, the finish, and the stopper type. Bring the old flange to the store if you can.
Step 1: Seal the flange. Roll a rope of plumber's putty and press it under the lip of the new flange, or use the silicone the manufacturer recommends. Some acrylic tubs call for silicone only, so check the tub maker's instructions.
Step 2: Thread it in. Screw the flange into the drain shoe clockwise by hand, then snug it with the drain key. Wipe away the putty that squeezes out.
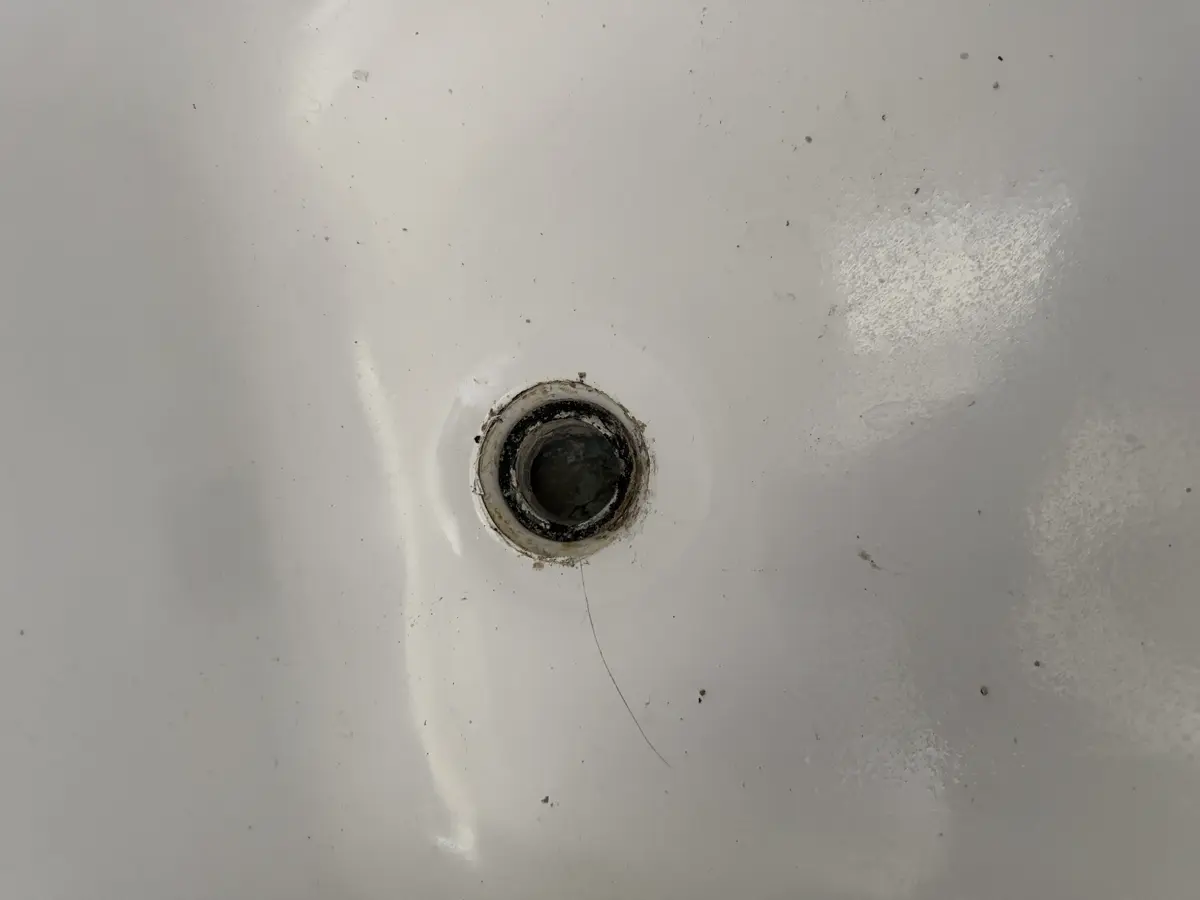
A clean, bare opening like this is what you want before the new flange goes in. This photo is from a job where we installed a new tub drain along with a new tub spout and shower valve. Old putty left behind is the most common cause of a new drain that weeps.
Step 3: Install the stopper and overflow. Put the stopper in the way you took it out, then reinstall the overflow plate with a new gasket if the old one was worn.
Step 4: Test it. Fill the tub above the overflow opening and let it drain. Check below the tub, if you can, for drips. Run the test twice. The Michigan plumbing code's fixture chapter covers how tub waste outlets and overflows must be built, which is why manufacturers design these parts to seal tightly.
If the leak shows up only when the tub is full, it is usually the overflow gasket. If it leaks every time water drains, look at the flange seal or the shoe. A slow leak like this can go unseen for months, and our leak detection service can find where it is coming from without guesswork.
Should you remove the drain to fix a slow tub?
Often, no. Most slow tubs are hair caught on the stopper, the crossbars or the overflow linkage. Pulling the stopper and linkage, cleaning them and putting them back fixes a large share of the slow tub calls we see.
If cleaning the stopper does not help, the clog is further down, past the drain shoe or in the trap. That is a job for a snake, not for taking the drain apart. Our guide on how to unclog a shower drain covers the same tools for a tub.
Skip chemical drain cleaners. As we explain in is Drano bad for pipes, they rarely clear hair clogs and make the job more dangerous for whoever works on the drain next. The EPA notes that bathing and showering are among the biggest uses of water in a home, so a tub drain sees a lot of hair and soap.
If you have a walk in shower rather than a tub, the hardware is different. See how to remove a shower drain instead.
If the slow drain is in more than one fixture, the problem is likely the line they share, and that is a drain cleaning job. A tub trap that keeps clogging may also not meet the trap rules in the Michigan plumbing code's chapter on traps.
How do I remove a bathtub drain stopper with no visible screw?
It is probably a flip it or a toe touch. Pull a flip it straight up while rocking it. For a toe touch, open it and turn the cap counterclockwise by hand. If the cap spins without coming loose, look under it for a center screw.
Do I need special tools to remove a bathtub drain?
Not for the stopper. A screwdriver, pliers and a rag handle almost every stopper. To remove the flange itself, you need a drain key or a drain extractor, both sold at hardware stores. A stripped flange is easier with an extractor.
Which way do you turn a bathtub drain to remove it?
Counterclockwise, the same as any standard thread. Turn steadily with a drain key. If the drain shoe below turns with the flange, stop and hold the shoe from underneath before continuing.
Can I replace a bathtub drain without access underneath?
Yes, if the drain shoe stays still while you turn the flange. Many replacements are done entirely from inside the tub. If the shoe spins or leaks, you will need to reach it through an access panel or the ceiling below.
Why does my tub leak only when it is full?
That usually points to the overflow gasket, the seal behind the overflow plate. When water rises above the overflow opening, it gets past a worn gasket and runs down the outside of the pipe. Replacing the gasket is a simple fix.
Should I use plumber's putty or silicone on a tub drain?
Plumber's putty is standard for most metal and cast iron tubs. Some acrylic and fiberglass tub makers recommend silicone instead because certain putties can stain those finishes. Check the tub's instructions before you choose.
When should I call a plumber to remove a tub drain?
Call if the flange will not turn, the drain shoe spins or is cracked, you see water stains below the tub, or the tub still drains slowly after you cleaned the stopper. Those point past the stopper to parts that are harder to reach.
Need help with a bathtub drain in Grand Rapids?
NSP Plumbing is a licensed Michigan plumbing contractor, license #8004990, based in Wyoming, MI. We replace tub drains, overflows and stoppers and clear slow tubs for homes across Grand Rapids, Wyoming, Kentwood and the surrounding area.
If your flange is seized, the shoe spins, or water is showing up on the ceiling below, we can handle it. We do tub and shower work, fixture installation and general plumbing repair. If the shower side is giving you trouble too, see how to fix a shower diverter that won't divert. Questions first? Contact us.
Tub drain stuck or leaking?
A licensed NSP plumber will check your stopper, drain and overflow, tell you whether a cleaning or a new drain is the right fix, and do the work with your approval. Book online and we will confirm your time.