Garbage disposals do not fail politely. One week the unit grinds a little louder, the next it hums and stops, or a slow drip shows up on the cabinet floor. Once the motor is gone or the body has rusted through, there is nothing left to repair, and the only real question is whether you swap it yourself.
To replace a garbage disposal, shut off the power, disconnect the drain and dishwasher hose, twist the old unit off its mounting ring, then hang the new one and reconnect everything. For a same brand swap on a plug in unit, plan on about 1 to 2 hours with basic hand tools.
How do you replace a garbage disposal?
Replacing a disposal is mostly unbolting and rebolting. The unit hangs from a metal ring under your sink, the drain connects to its side, and power comes in through a cord or a wire at the bottom. Nothing about it requires cutting pipe in a normal swap.
Here is the whole job in one view, so you know what you are signing up for before you open the cabinet:
| Stage | What you do | Typical time |
|---|---|---|
| Shut it down | Unplug the unit or turn off the breaker | 5 minutes |
| Disconnect | Loosen the drain pipe and the dishwasher hose | 10 to 15 minutes |
| Remove | Twist the old unit off the ring and lower it out | 10 minutes |
| Prep the sink | Decide whether to keep or replace the sink ring | 5 to 30 minutes |
| Hang the new unit | Lift, line up and twist it onto the ring | 15 to 20 minutes |
| Reconnect | Drain pipe, dishwasher hose, power | 15 to 20 minutes |
| Test | Run water, run the motor, check for drips | 10 minutes |
The biggest time swing is the sink ring. If your new disposal is the same brand and uses the same mount, you can often hang it on the old ring and skip the messiest part of the job.
If the brand changes, or the old ring is rusted or loose, plan on pulling the old ring out of the sink and setting a new one.
Two parts of the job are not plumbing at all. The power connection is electrical, and the dishwasher hose decides whether your dishwasher drains afterward. We cover both below, because those are the two places where do it yourself installs most often go wrong on the calls we get.
What parts are in a garbage disposal install?
Before you take anything apart, it helps to know the names of the pieces you are about to touch. A disposal looks like one black can under the sink, but it is really five parts working together.
Here is a finished install from one of our jobs, with every part in view.
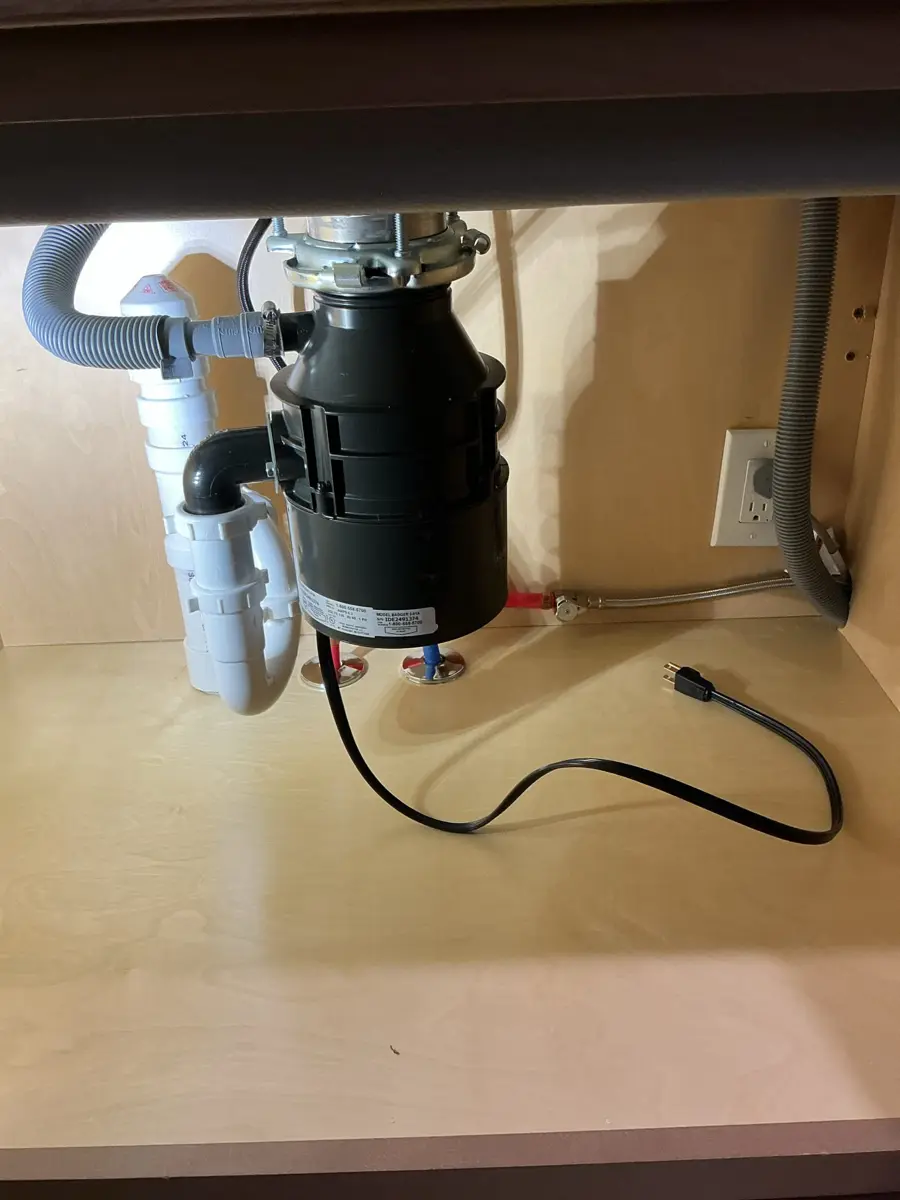
This is what a correct swap looks like when it is done: one unit hanging from the sink, a tight drain pipe, the dishwasher hose on top, and a cord to the outlet.
The sink flange. This is the shiny metal ring you see when you look down into the sink drain. It sits in a bead of plumber's putty, a soft clay that seals it to the sink.
The mounting ring. Under the sink, the flange is held by a set of rings and screws. The disposal hangs from the lowest ring and locks on with a twist, like a jar lid.
The discharge tube. This is the short elbow of pipe on the side of the disposal. It carries ground food and water out of the unit and into the drain.
The trap. The U shaped bend of pipe after the disposal holds a little water at all times. That water blocks sewer gas from coming up into your kitchen.
The dishwasher inlet. Most disposals have a small round nipple near the top where the dishwasher drain hose connects. On a brand new unit, that inlet is sealed shut inside by a knockout plug, a small disc of plastic you punch out only if a dishwasher is connected.
The power connection. Most homes use a plug in cord running to an outlet under the sink, usually controlled by a wall switch. Some disposals are hardwired, meaning the wire runs straight into a box on the bottom of the unit with no plug.
The Michigan plumbing code, Section 416 sets the basic rules: a home disposal must be a listed and labeled unit, it must drain to a pipe at least 1 1/2 inches across, and it needs a cold water supply, which your sink faucet provides.
How do you pick the right replacement disposal?
Pick the new unit before you remove the old one. That way the kitchen sink is out of service for an afternoon, not a weekend, and you can check the label on the old unit while it is still easy to read.
Start with the label on the bottom or side of the old disposal. It tells you the brand, the model and the electrical rating.
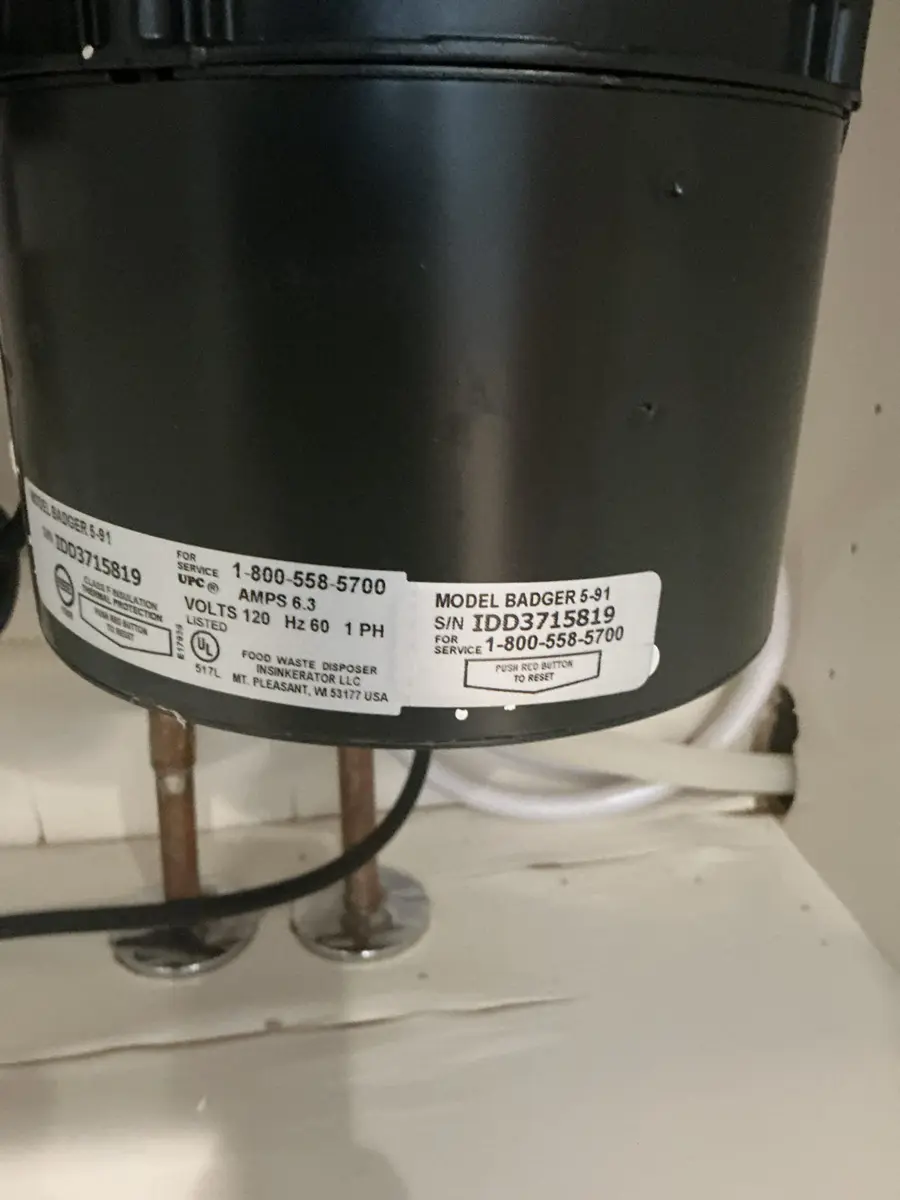
This homeowner had a Badger 5, InSinkErator's half horsepower model. Matching the brand means the new unit can usually hang on the same mounting ring.
That one fact saves the most work. Each major brand uses its own mount, so a unit from a different maker usually comes with its own sink flange and rings, and the old ones have to come out of the sink. Manufacturers such as InSinkErator list which of their models fit their standard mount.
Horsepower. Most homes do well with a half or three quarter horsepower unit. A half horsepower unit handles a household that scrapes plates into the trash and rinses the rest. Step up if you cook from scratch most nights or have a large family.
Bigger motors are also heavier and taller, so measure the space under the sink, especially if the trap sits low.
Feed type. Continuous feed units run while you push food in with the water on, and they are what almost every kitchen has. Batch feed units only run with a stopper locked in, which is safer around kids but slower.
Electrical rating. The label also lists amps and motor speed. Compare it to the new unit.
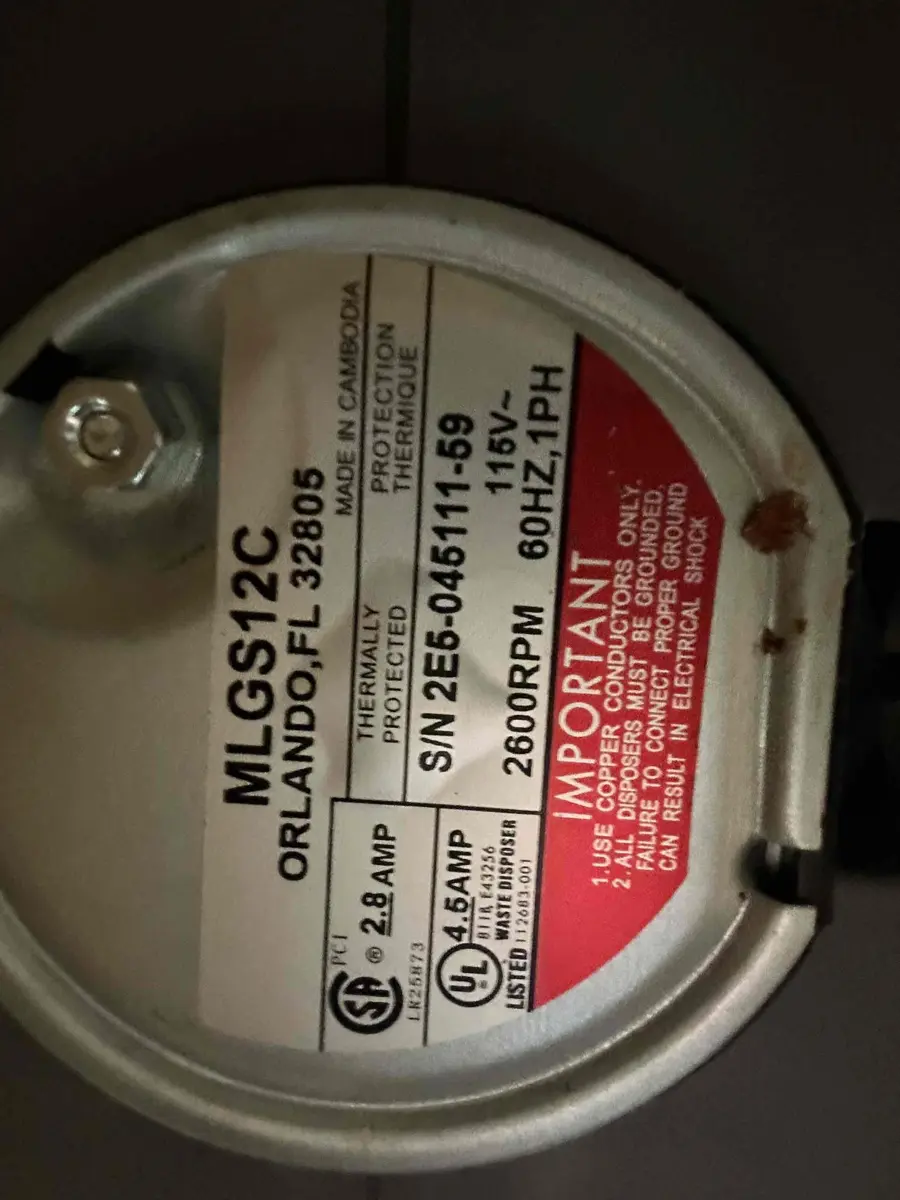
If the new unit draws noticeably more amps than the old one and shares a circuit with the dishwasher, have an electrician look before you install it.
Last, check whether the new box includes a power cord. Many units ship without one, and you either move the old cord over or buy the cord kit the maker lists.
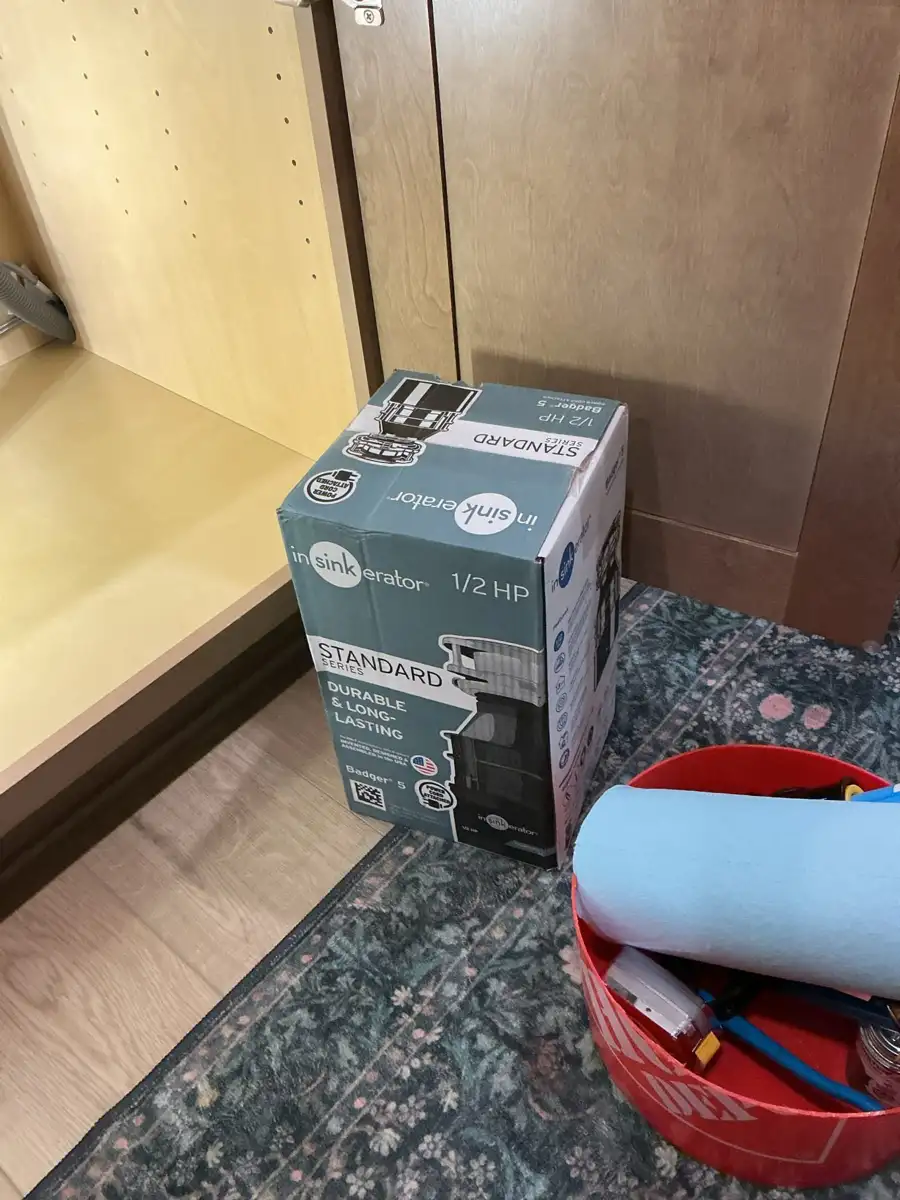
A new half horsepower unit staged at the sink before the old one comes out. Open the box first and confirm the mount, the cord and the dishwasher inlet before you take anything apart.
How do you remove an old garbage disposal?
Clear out the cabinet, set a bucket and an old towel under the unit, and have a flat screwdriver, channel lock pliers and the small hex wrench that came with the disposal. Wear eye protection, because old units drip dirty water when they come loose.
Step 1: Shut off the power. Unplug the cord from the outlet under the sink. If the unit is hardwired, turn off its breaker at the panel, then flip the wall switch to confirm the disposal stays silent.
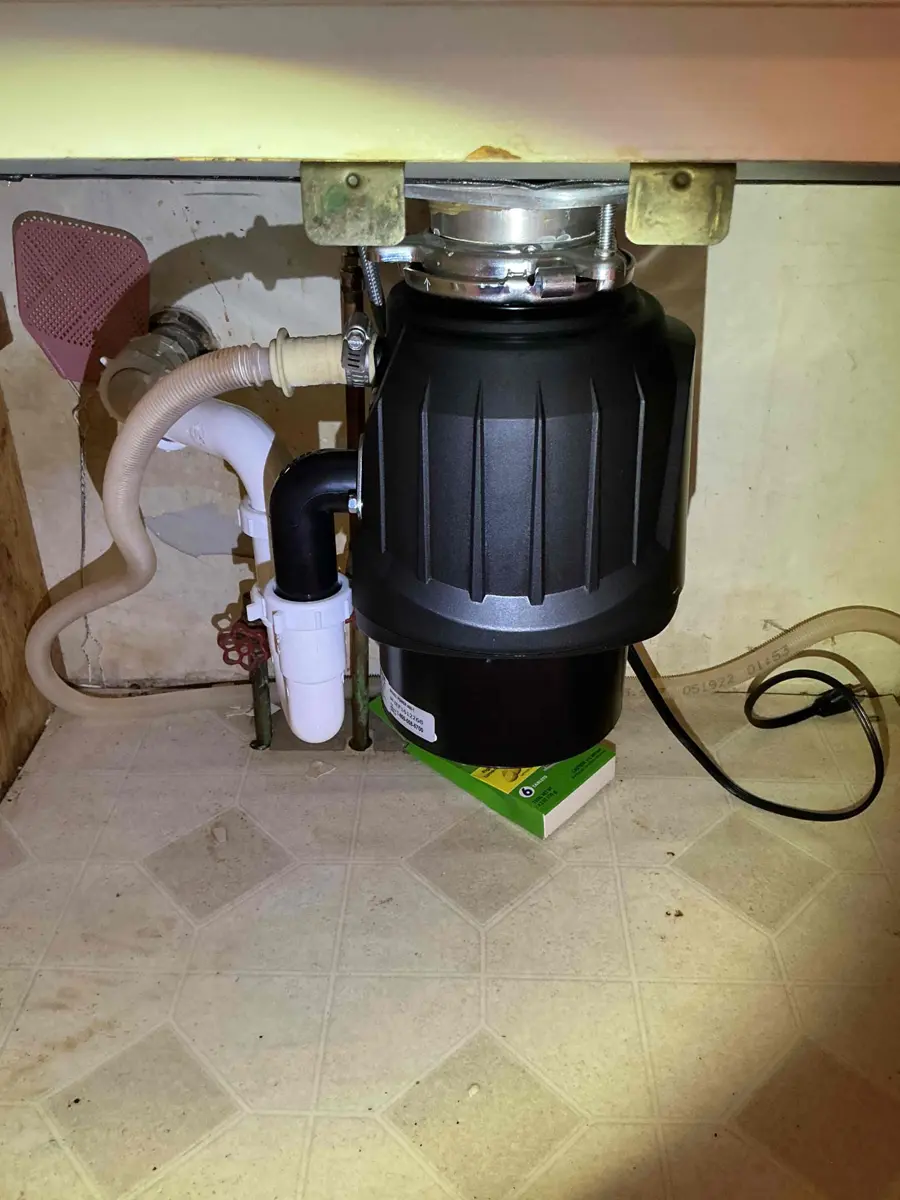
This cord is the only thing between you and a live motor. Pull the plug before your hands go near the unit.
If you see a wire running straight into a metal plate on the bottom of the disposal with no plug, it is hardwired. Turning off the breaker is not optional on that setup, and if you are not comfortable with household wiring, stop here and call an electrician for the power side.
Step 2: Disconnect the drain and dishwasher hose. Loosen the slip nut, the large plastic or metal nut where the discharge tube meets the trap. Then loosen the clamp on the dishwasher hose and pull the hose off the inlet. Expect a cup or two of water to drop into your bucket.
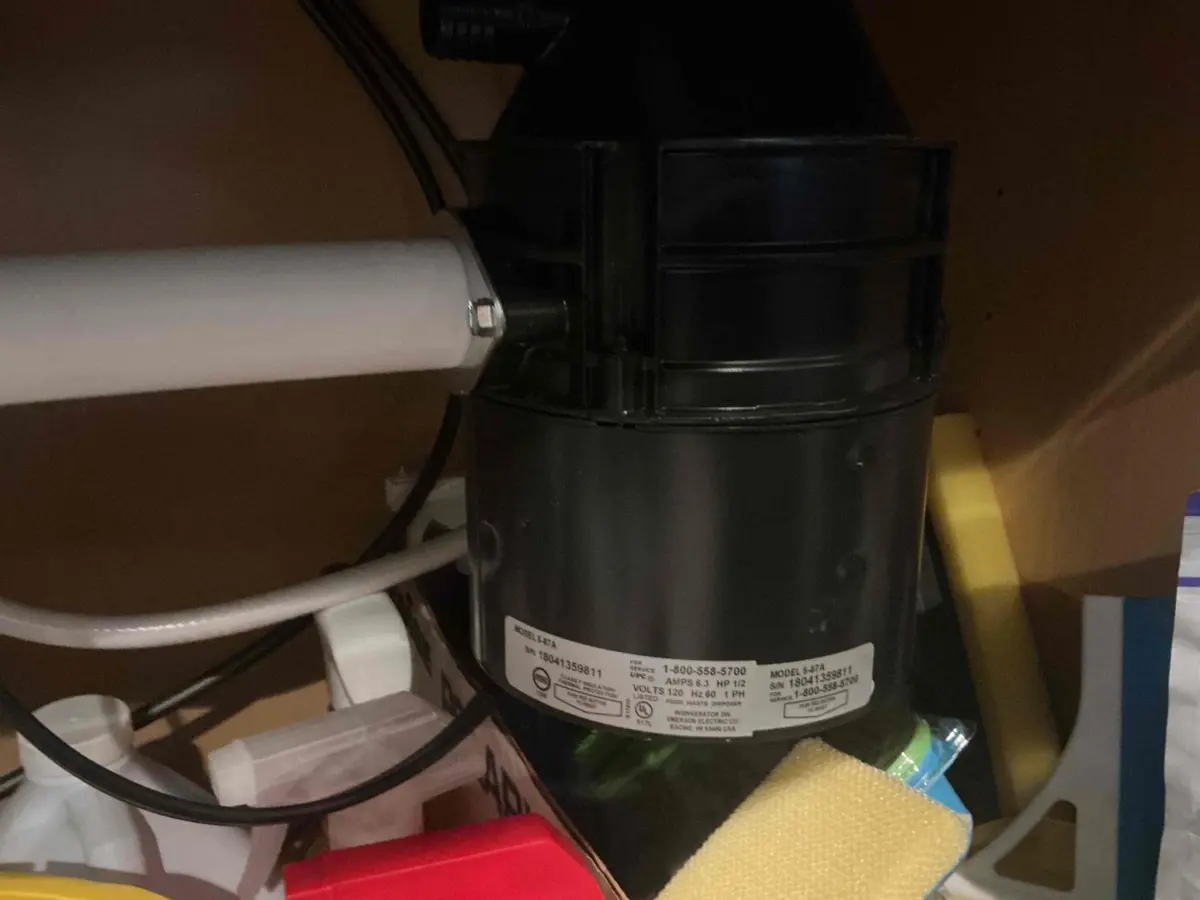
This is the old unit still hanging in place. Once the drain and hose are off, nothing holds it up except the mounting ring.
Look at the drain pipe while it is open. If the pipe beyond the trap is packed with grease or food, clear it now. A new disposal will not fix a clog that lives further down the line, which is covered in our guide to unclogging a kitchen sink.
Step 3: Twist the old unit off the ring. Hold the bottom of the disposal with one hand. Put a screwdriver into one of the tabs on the lower mounting ring and turn it to the left, the same direction as loosening a jar. The unit drops free once the ring releases.
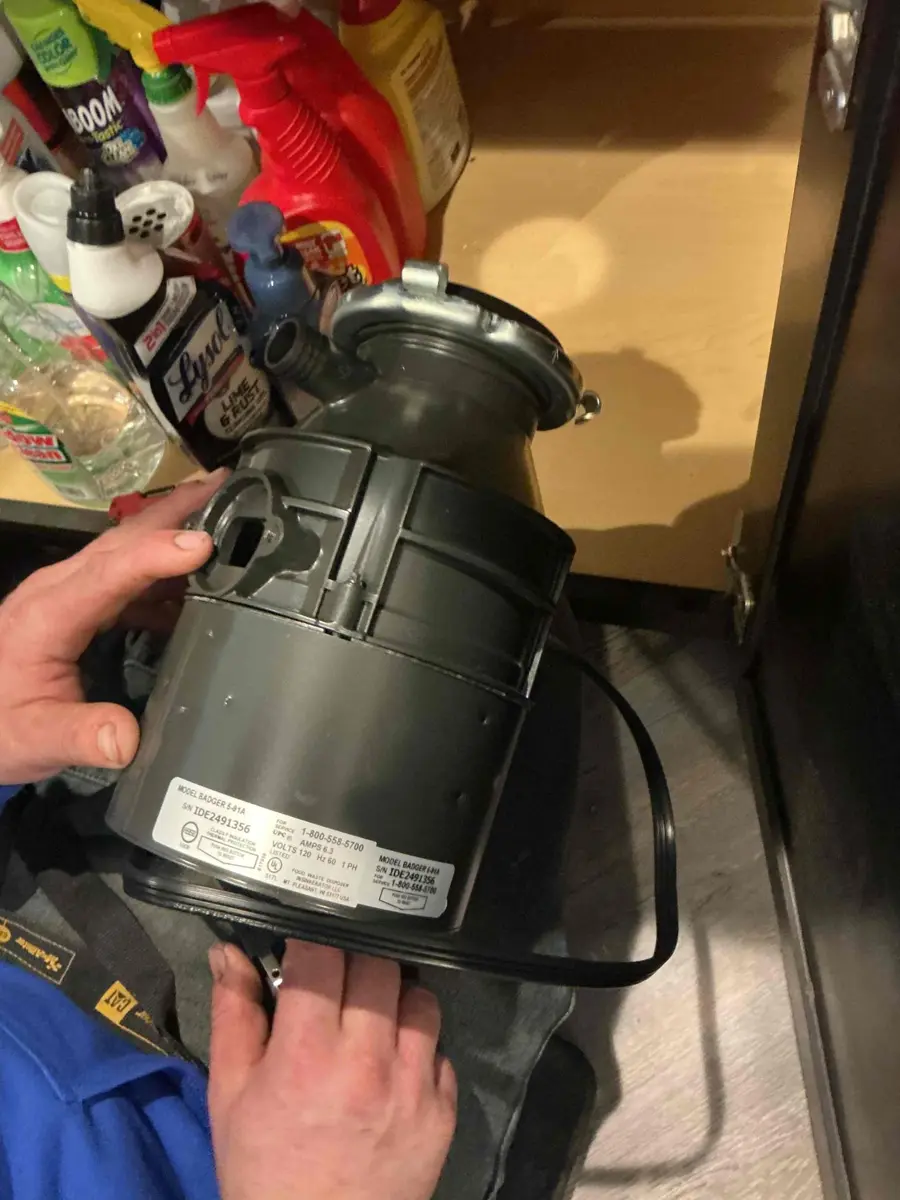
This unit had rusted through at the bottom. When the body itself is corroded, replacing it is the right call, not a repair.
A disposal is heavier than it looks, especially with water still inside. Keep it supported as you turn the ring, and tip it over the bucket before you set it down.
Do you need to replace the sink flange and mounting ring?
Look up into the cabinet now that the old unit is out. You will see the bottom of the sink drain opening and the remaining mounting rings.
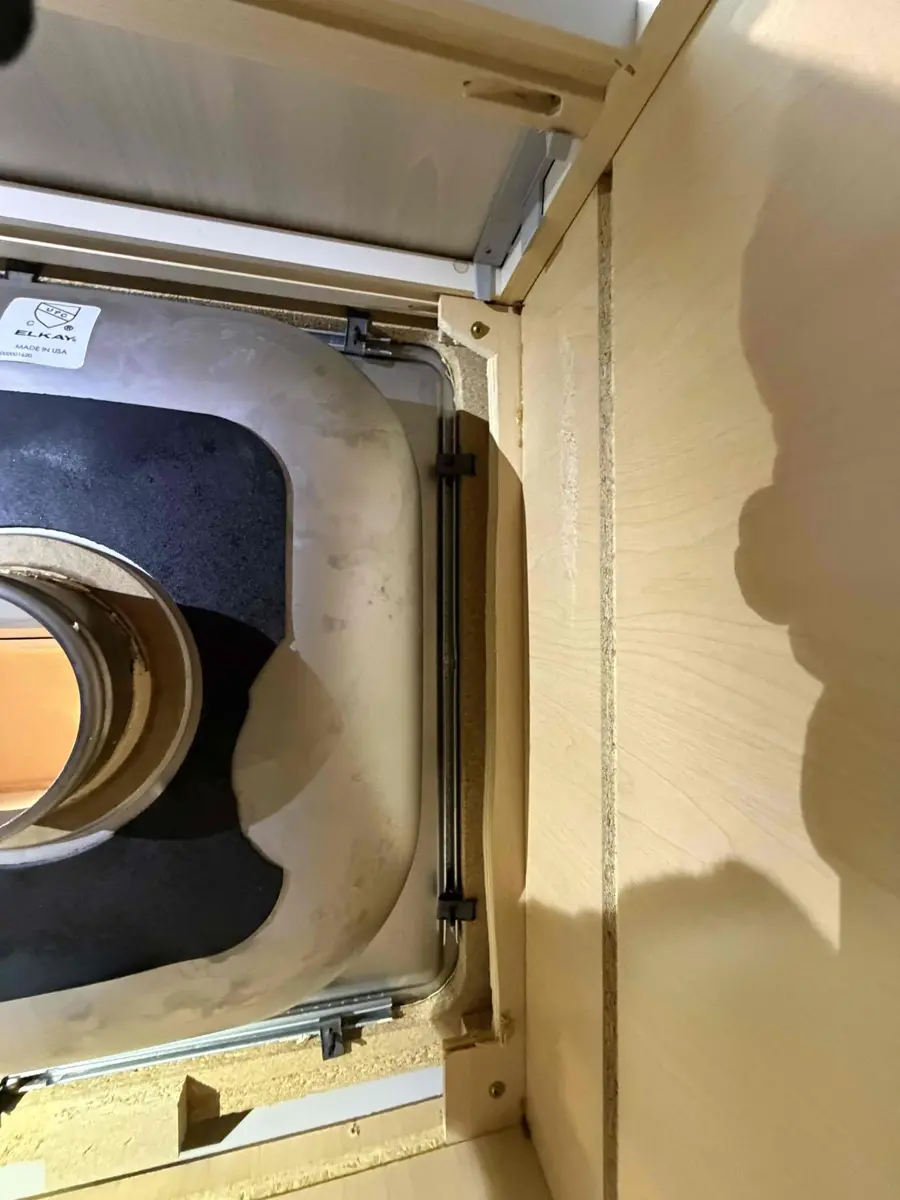
With the disposal out, this is the opening you are working with. If the ring here is solid and the new unit is the same brand, you can often reuse it.
Keep the old flange and ring if all three of these are true: the new unit is the same brand and mount, the flange has never leaked at the sink, and the rings are not rusted or bent.
Replace them if any of these are true: the brand is changing, you had a drip at the top of the old disposal where it met the sink, or the screws are frozen with rust. A leak at the top is almost always the putty under the flange, and it will keep leaking into the new unit too.
Step 4: Remove and reset the flange if needed. Loosen the three mounting screws, pry off the snap ring that holds the assembly, and push the old flange up through the sink. Scrape the old putty off the sink until the metal is clean.
Roll a rope of fresh plumber's putty and press it around the underside of the new flange. Set it in the drain hole, put a little weight on it from above, and assemble the new gasket, backup ring, mounting ring and snap ring underneath following the maker's sheet.
Tighten the screws evenly, a little at a time, so the flange seats flat. Wipe the squeezed out putty off the sink.
One real example from our jobs: a homeowner called back in February because the ring on a recently installed disposal was coming apart. A mount that was tightened unevenly, or a snap ring that never fully seated, will loosen with vibration. Take your time on this step.
How do you install the new garbage disposal?
With the ring ready, the new unit goes in faster than the old one came out.
Step 5: Prep the new unit before you lift it. If a dishwasher drains through the disposal, knock out the dishwasher plug now. Put a screwdriver against the plug inside the inlet and tap it with a hammer until it pops loose, then shake the disc out of the grinding chamber. Skip this step if you have no dishwasher.
If the unit came without a cord, attach the cord now, following the wiring sheet in the box, and screw the bottom cover back on. Attach the discharge tube to the side outlet with its gasket and flange.
Step 6: Hang the unit and connect the drain. Lift the disposal up to the mounting ring, line up the three tabs with the ring, and turn the lower ring to the right until it locks. Rotate the whole unit so the discharge tube lines up with the trap, then tighten the slip nut by hand plus a quarter turn.
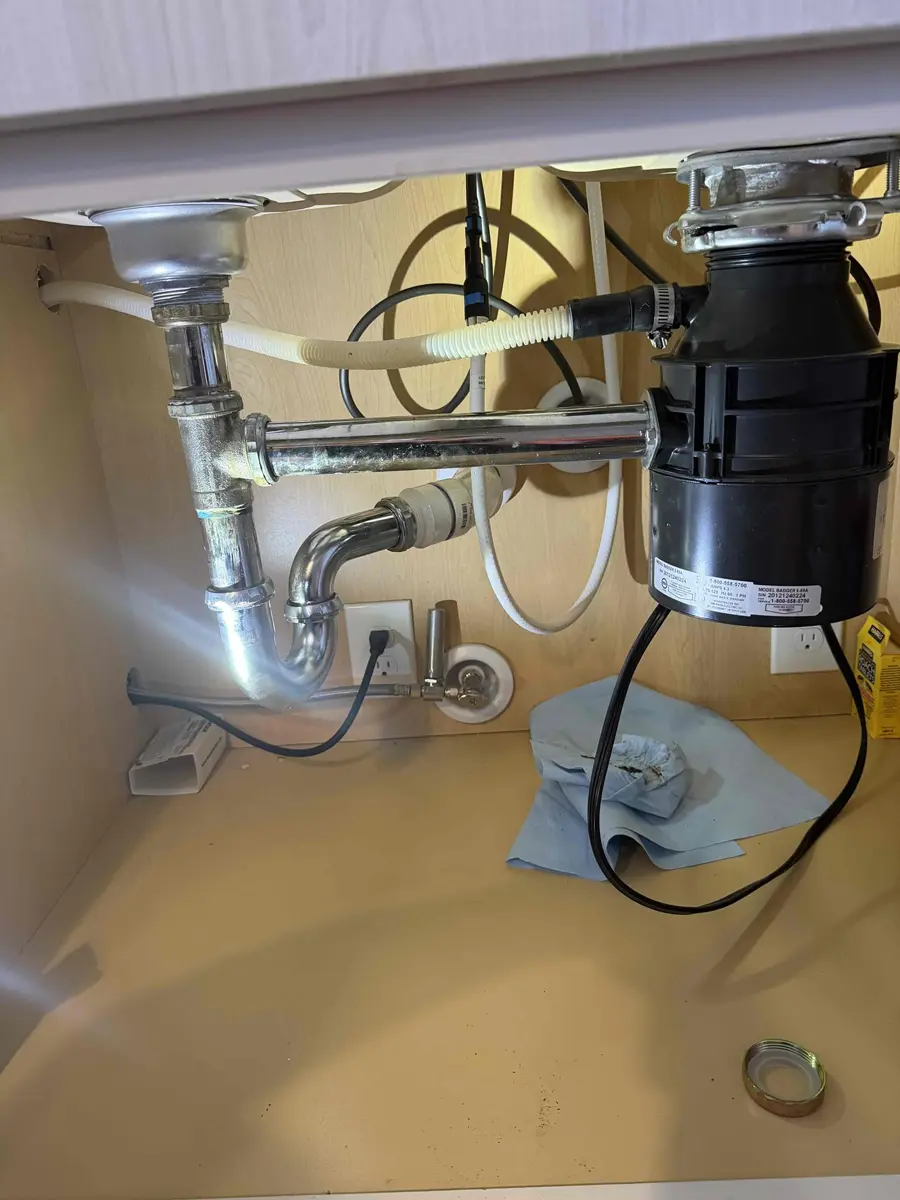
The discharge tube here runs straight and level into the trap. A tube that has to bend or strain to reach usually means the unit is rotated wrong, and it will leak at the nut.
If the new unit is taller than the old one, the discharge tube can end up below the trap inlet. Water cannot run uphill, so that setup drains poorly and holds food.
The fix is a shorter discharge tube or lowering the trap, and if the drain pipe in the wall is already too high, that is a job for a plumber.
Step 7: Reconnect the dishwasher hose and power. Slide the dishwasher hose onto the inlet and tighten the clamp. The Michigan plumbing code requires the dishwasher drain line to rise and fasten to the underside of the counter or sink rim before it drops to the disposal, which keeps dirty sink water from flowing back into the dishwasher.
If your hose lies flat on the cabinet floor, loop it up and clip it high.
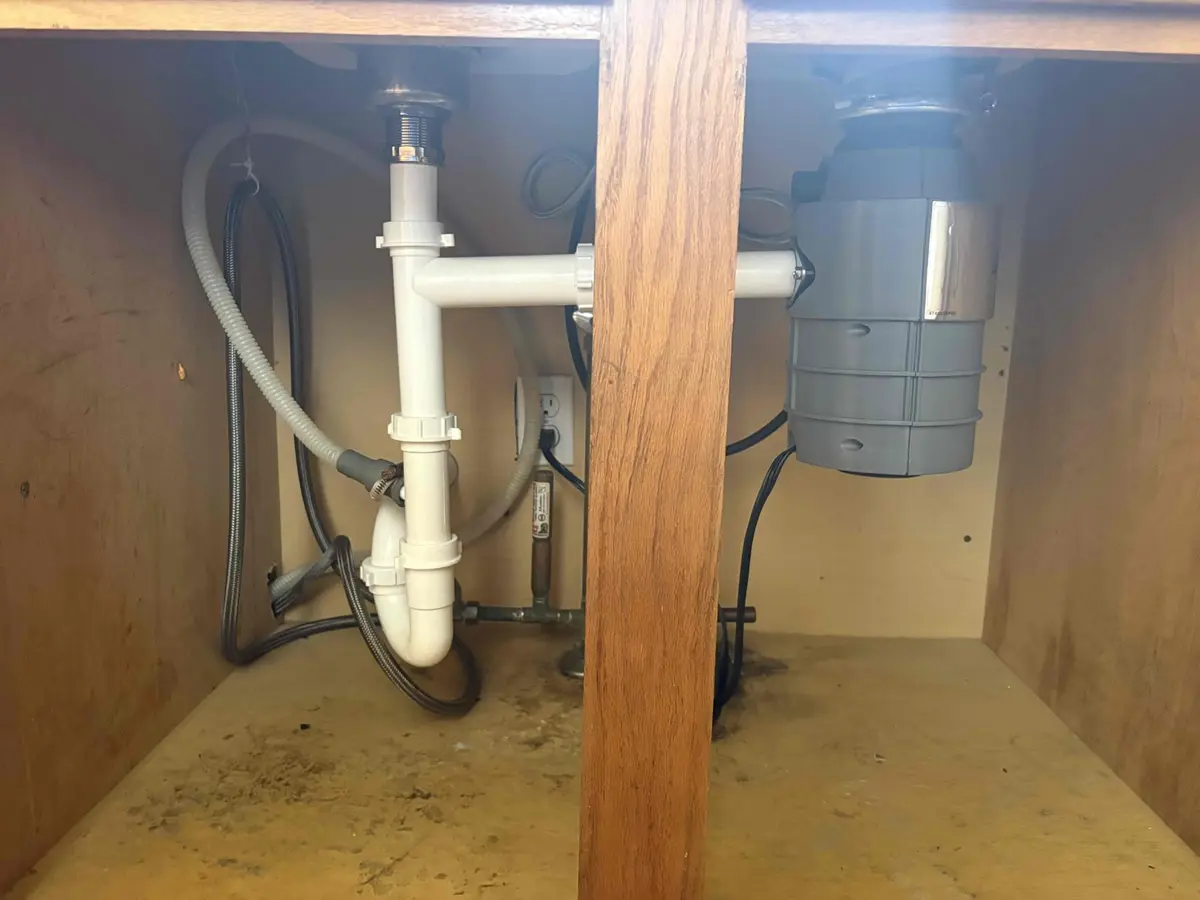
A finished install: the trap is tight, the dishwasher hose runs up and over, and the unit sits plumb under the sink. This one is ready to test.
Plug the cord back into the outlet, or turn the breaker back on for a hardwired unit.
How do you test a new garbage disposal for leaks?
Step 8: Run water first, then the motor. Put a dry paper towel on the cabinet floor under the unit. Run cold water into the sink for a minute with the disposal off, then check every joint with a dry tissue: the flange at the top, the discharge tube, the trap and the dishwasher hose.
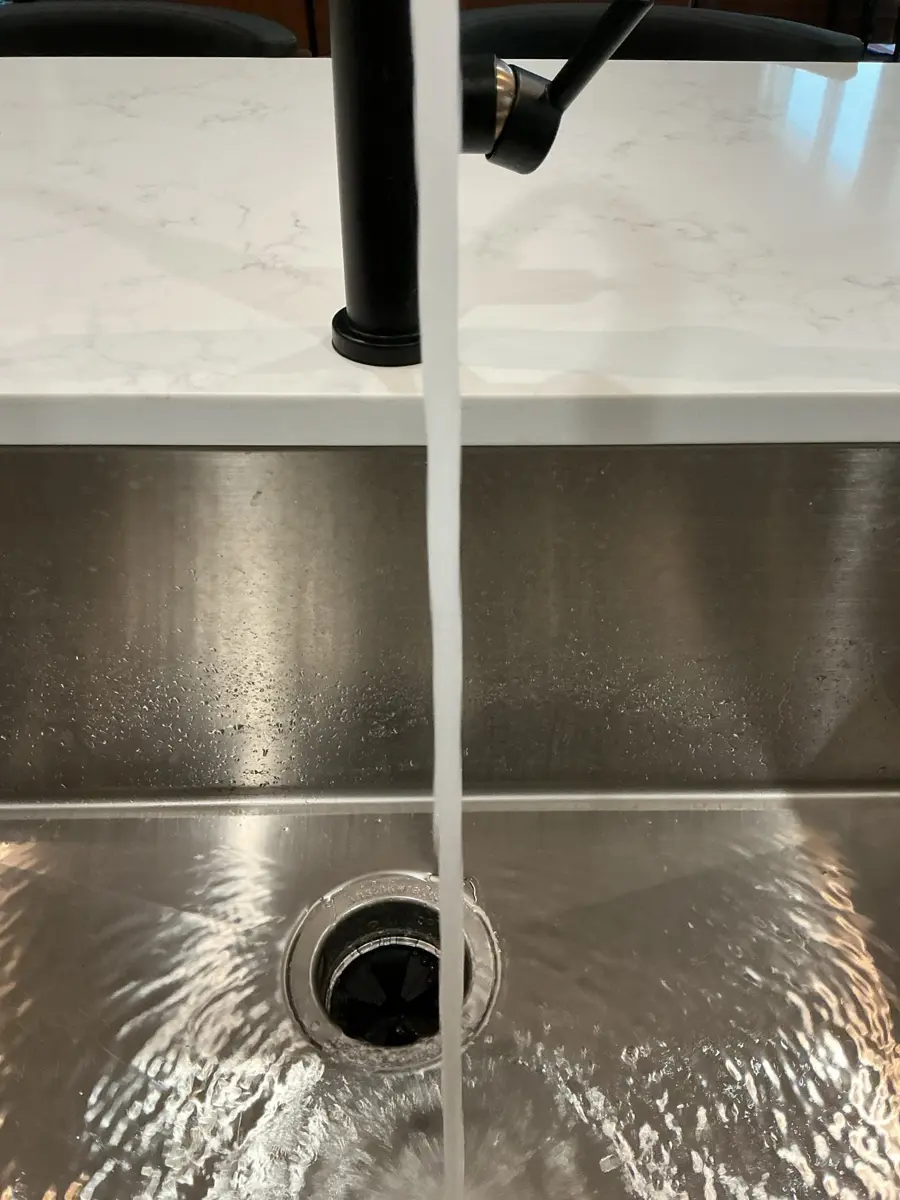
Cold water flowing straight down with no pooling means the drain is clear. Now check underneath, because a dry towel tells you more than the sink does.
Then turn the disposal on with the water running. It should spin up smoothly with a steady whir and no rattling. Run the dishwasher on a short cycle to confirm it drains, and check the hose clamp again while it pumps out.
If the dishwasher will not drain after a swap, the knockout plug is the first thing to check. We have been called to kitchens where a handyman installed a disposal and the dishwasher stopped draining the same day, and an unpunched plug is the most common cause of that symptom.
Keep the paper towel under the unit for a day or two. A slow drip from the top flange sometimes shows up only after the putty settles.
When should you call a plumber to replace a garbage disposal?
A same brand, plug in swap is a reasonable do it yourself job. These situations are where it stops being simple:
The unit is hardwired and you do not work with wiring. NSP Plumbing does not do electrical work. If the new unit needs a new circuit, a new outlet or a switch, call a licensed electrician for that part.
The sink flange is rusted or the sink is cracked around the drain. Forcing a frozen ring can bend a thin stainless sink.
The drain sits too high for the new unit. That is a pipe change in the wall or cabinet, and it is better done once.
The sink drained slowly before the swap. The clog is past the disposal, and a new unit will not fix it. Our drain cleaning visit clears the line itself.
The old disposal is not actually dead. A hum, a jam or a tripped reset button is often a ten minute fix. Before you buy a new unit, run through how to fix a garbage disposal, and keep a new one running longer with how to clean a garbage disposal.
If you are planning a new sink or faucet anyway, swapping the disposal at the same time saves a second trip under the cabinet. Our fixture installation team handles the sink, faucet and drain together.
Food scraps that never go down the drain are easier on the pipes too, and the EPA's food waste tips cover composting and storage that cut down what ends up in the disposal.
How long does it take to replace a garbage disposal?
A same brand swap on a plug in unit takes about 1 to 2 hours for most homeowners. Changing brands adds time, because the old sink flange and mounting ring have to come out and a new flange has to be set in fresh plumber's putty.
Can I replace a garbage disposal myself?
Yes, if the unit plugs into an outlet and the drain lines up. It is unbolting and rebolting with hand tools. Call for help if the unit is hardwired and you do not work with wiring, the sink flange is rusted, or the drain pipe sits too high for the new unit.
Do I need to replace the mounting ring with a new disposal?
Not always. If the new unit is the same brand and mount, and the old flange has never leaked, you can usually reuse it. If the brand is changing or the top of the old unit leaked, replace the flange and ring with the ones that come in the box.
Why won't my dishwasher drain after replacing the disposal?
The most common cause is the knockout plug inside the dishwasher inlet on the new disposal. New units ship with that inlet sealed. Unplug the disposal, remove the hose, knock the plug out with a screwdriver, and fish the disc out of the grinding chamber.
What size garbage disposal do I need?
Most homes do well with a half or three quarter horsepower unit. Go bigger if you cook from scratch most nights or have a large household. Measure the space under the sink first, because larger motors are taller and can end up below the drain pipe.
Do I need a permit to replace a garbage disposal in Michigan?
Rules vary by city, so check with your local building department. Adding new drain piping or a new electrical circuit is the kind of work that typically needs one. The State of Michigan plumbing permit page explains who can pull one, and a licensed contractor handles it as part of the job.
Should I repair or replace my garbage disposal?
Repair it if it hums, jams or will not turn on, since those are usually a jam or a tripped reset button. Replace it if water leaks from the bottom of the unit, the body is rusted, or the motor runs hot and smells like burning after a reset.
Need a garbage disposal replaced in West Michigan?
NSP Plumbing is a licensed Michigan plumbing contractor, license #8004990, based in Wyoming. We replace and install garbage disposals across Grand Rapids, Wyoming, Kentwood, Grandville, Jenison, Byron Center, Caledonia, Walker, Rockford and nearby towns.
Our garbage disposal installation service covers removing the old unit, setting a new flange, connecting the drain and dishwasher, and testing everything before we leave. If something else under the sink needs attention, our plumbing repair techs can handle it on the same visit. Read what neighbors say on our reviews page, or contact us to book.
Want the disposal swapped for you?
A licensed NSP plumber removes the old unit, installs the new one, connects your dishwasher and tests for leaks before leaving. Book a time that works for you and we will confirm the details by phone.