
You found a shower head you like online, or a friend swears by the one in their guest bath, and now you are standing in your own shower wondering if it will actually fit. It is a fair question, because the boxes rarely say so in plain words.
Yes, for almost every home in the United States: shower heads screw onto a standard 1/2 inch threaded shower arm, so nearly any new head fits. What changes from one head to the next is the water flow, the mounting style and whether a handheld needs an extra diverter, not the thread size.
Are shower heads universal?
For practical purposes, yes. Nearly every home in the US has the same connection behind the shower head: a short bent pipe coming out of the wall, called the shower arm, with a 1/2 inch pipe thread on the end.
Shower head makers build their products to screw onto that thread, so a fixed head from one brand will fit an arm installed for another brand.
That is why you can buy a head at any hardware store without measuring anything first. The thread is the one part of a shower that has been standardized for decades.
Here is what is not universal, and what actually decides whether you will be happy with the swap:
- Flow rate. Heads are capped at a maximum flow, and some are built to use even less. Two heads that both fit can feel very different.
- Mounting style. A fixed head, a handheld on a hose, a big rain head and a ceiling mount all attach differently past the thread.
- Reach and angle. A wide rain head on a short, steep arm can end up aimed at the wall or hitting you in the forehead.
- The condition of the arm. Old arms can be corroded, cracked or loose inside the wall, and a new head will not fix that.
So the short answer is that the thread fits. The longer answer is that the fit is only the first of several things worth checking before you spend money. The sections below walk through each one, and then how to swap a head in about ten minutes.
What parts make up a shower head connection?
Before you shop or start turning things, it helps to know the three parts you are looking at, because people use the words loosely.
The lead in photo below is from a call where a leak behind the wall turned out to be at the arm, not the head. With the head off, you can see every part clearly.
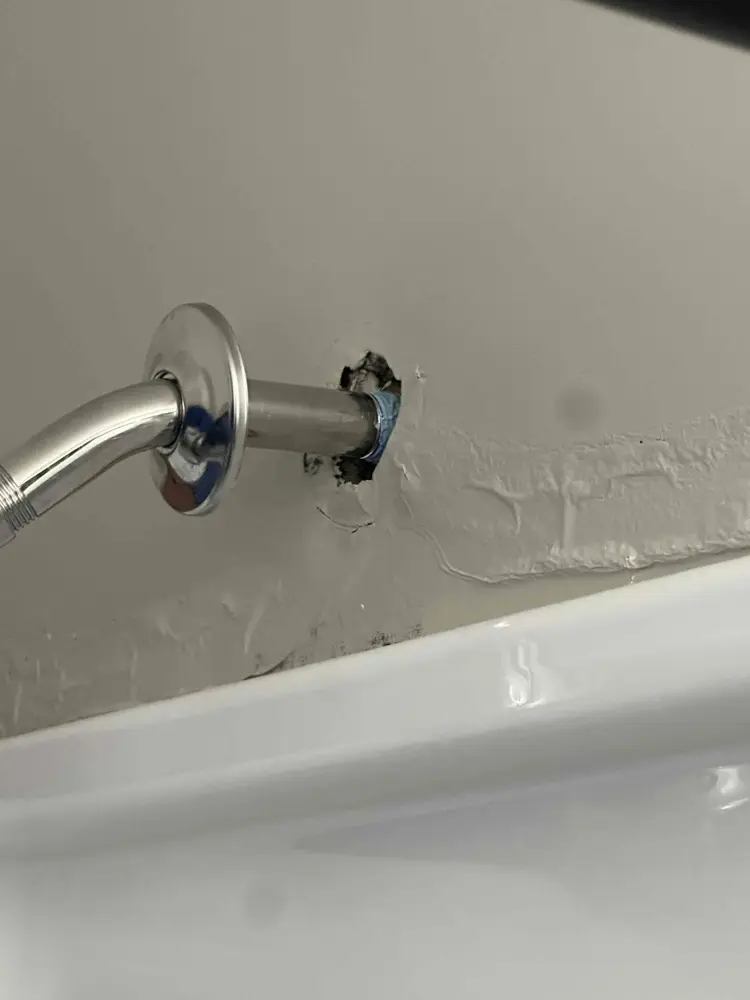
This is the standard setup almost every head screws onto. The threaded end on the left is where the head goes, the round plate is just trim, and the blue tape at the wall end seals the arm into the fitting hidden behind the wall.
The shower arm is the bent pipe that sticks out of the wall. One end screws into a fitting inside the wall, the other end has the thread your head attaches to. Most are about 6 to 8 inches long with a downward bend.
The flange (plumbers call it an escutcheon) is the round cover plate that slides over the arm and sits flat against the wall. It is decorative. It hides the hole in the tile or surround and does not hold any water back.
The shower head is the part you choose. Inside the connection end you will find a small rubber washer, a fine screen and usually a plastic flow restrictor, which is a disc with a small hole that limits how much water passes through.
Those three tiny parts matter more than people think, and we come back to them below.
Behind the wall, out of sight, the arm screws into a fitting that is fastened to the framing, and that fitting is fed by the shower valve. The valve is what your handle controls. If you ever want the full picture of that part, our guide on how to replace a shower valve walks through it.
What shower head styles fit a standard arm?
Every style below screws onto the same 1/2 inch arm thread. What differs is what else you need and how it will hang once it is on.
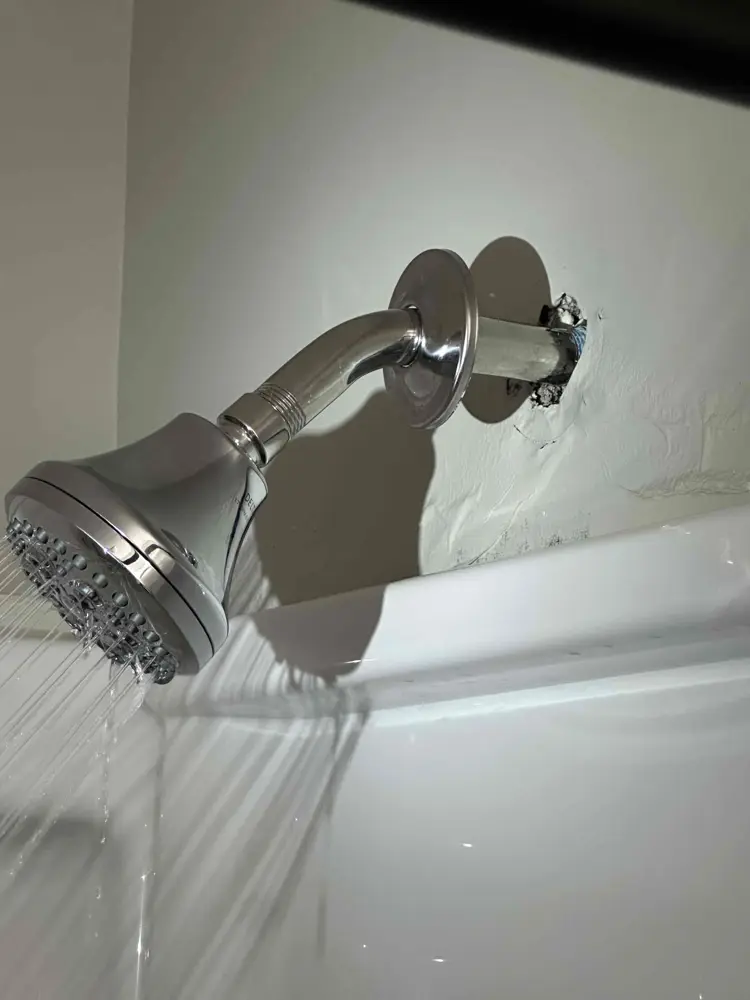
A fixed head is the simplest swap and fits almost any shower. This one went back on the same arm after a repair, with nothing more than fresh thread tape and a hand tight turn.
Fixed heads. The classic. It screws straight onto the arm and pivots on a ball joint so you can aim it. Any fixed head fits any standard arm.
Handheld heads. A head on a hose, held in a cradle. Some kits have the cradle built into a piece that screws onto the arm. Others use a slide bar mounted to the wall, which means drilling into tile or a fiberglass surround. The thread still fits, but the wall mount is the part that takes work.
Combo or two in one units. A fixed head and a handheld sharing one connection, with a small lever (called a diverter) that sends water to one, the other, or both.
The next photo is from a home where we replaced old heads with this kind of combo after the homeowner asked for a handheld option for a family member.
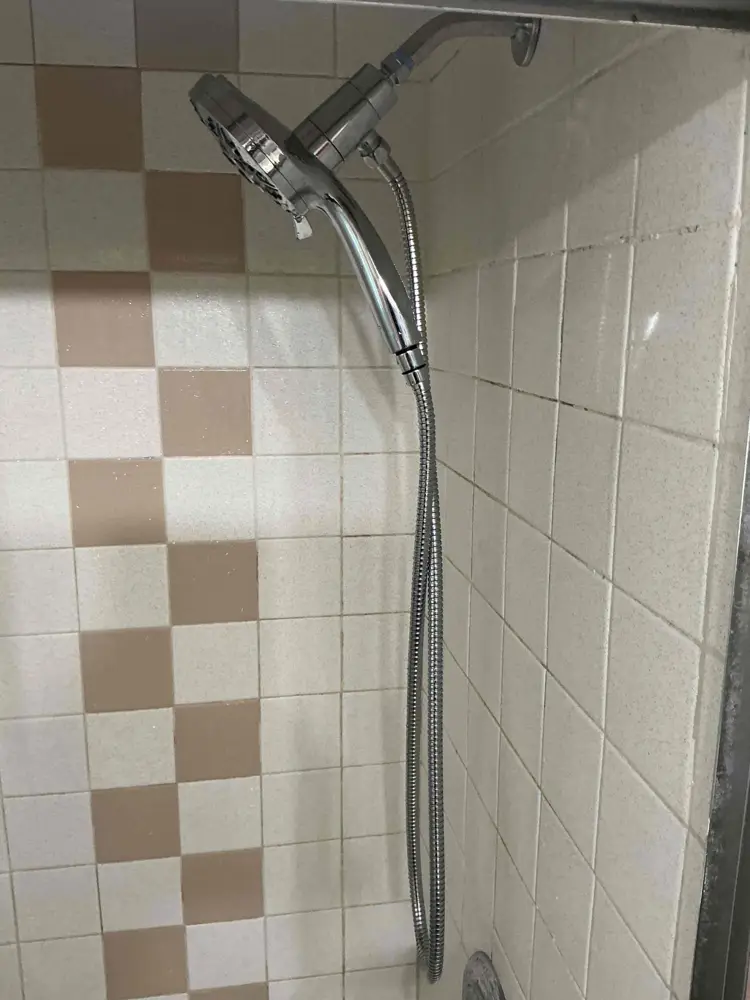
A combo unit is a good choice when one person in the house needs a handheld. It screws onto the same arm as the old fixed head, so no wall work was needed here.
Rain heads. Large, flat heads meant to rain straight down. They screw onto the standard thread, but on a normal arm that angles out from the wall they often sit too low and too close to the wall. Most people who want a true rain shower also buy an extension arm, which is covered below.
Ceiling mounts. A rain head hanging from a straight drop arm in the ceiling. The head itself uses the same thread, but the water line has to come out of the ceiling, which means opening the ceiling and running new pipe. That is a remodel, not a swap.
Body sprays and multiple heads. Wall jets and second heads need their own water supply and usually a different valve. These are not a screw on upgrade. If that is the goal, it belongs in a shower and tub installation plan.
Do I need anything extra for a handheld or rain head?
Usually one small part. A handheld or a second head needs a way to split the water, and a rain head often needs more height or reach than your current arm gives.
For a handheld added to an existing fixed head, the part is a diverter mount. It screws onto the arm, the fixed head screws onto it, and the handheld hose connects to its side outlet.
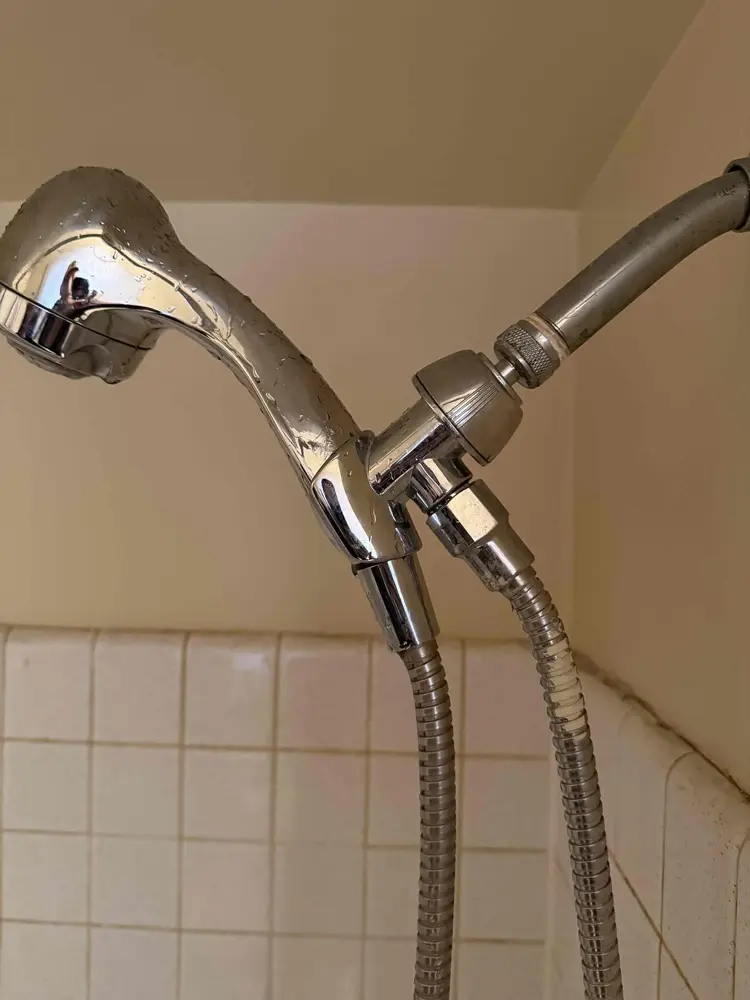
This diverter mount is what lets a handheld and a fixed head share one arm. If water drips from the hose connection after an install like this, the cause is usually a missing washer in the hose nut, not the arm.
For rain heads, the part people end up buying is an extension or riser arm. It screws onto your existing arm and raises or extends the head so it rains down instead of spraying at the wall.
Look for one that is rated to carry the weight of the head you chose, because a heavy head on a long thin arm will droop.
The photo below shows both ideas together: a square rain style head on a short arm, with a diverter feeding a handheld hose underneath it.
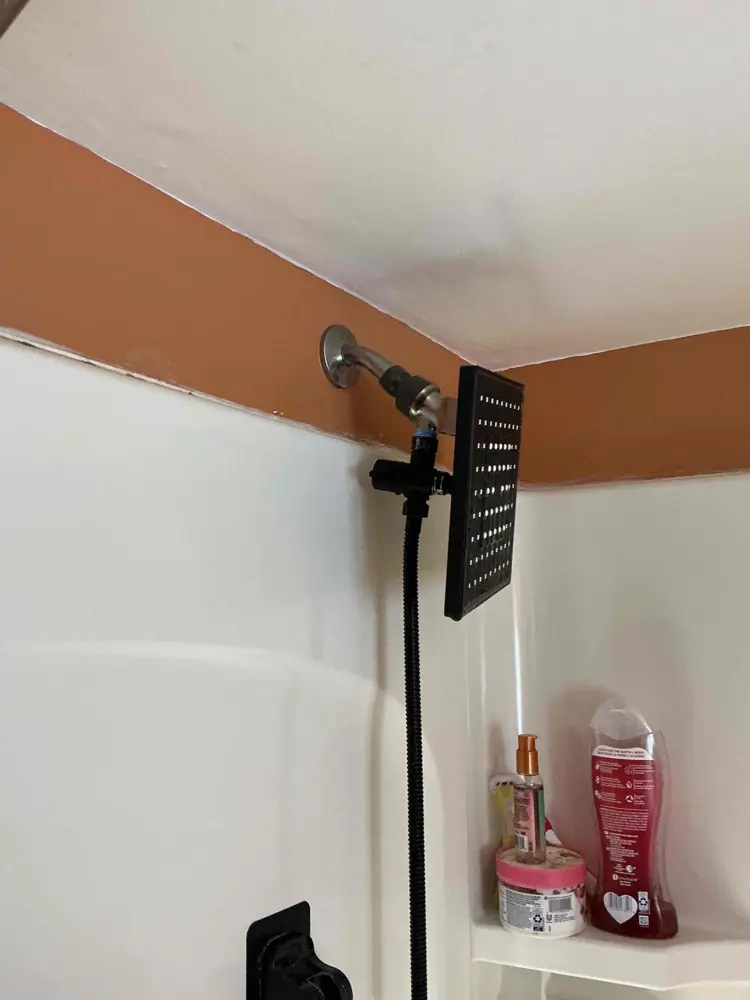
A rain head on a standard arm works, but notice how close to the wall it sits. If you want water falling straight down over your head, plan for an extension arm before you buy, not after.
Last, dual head units like the one below are a single piece that screws on and carries two heads, often with two hoses. They fit the standard thread, but they are heavy.
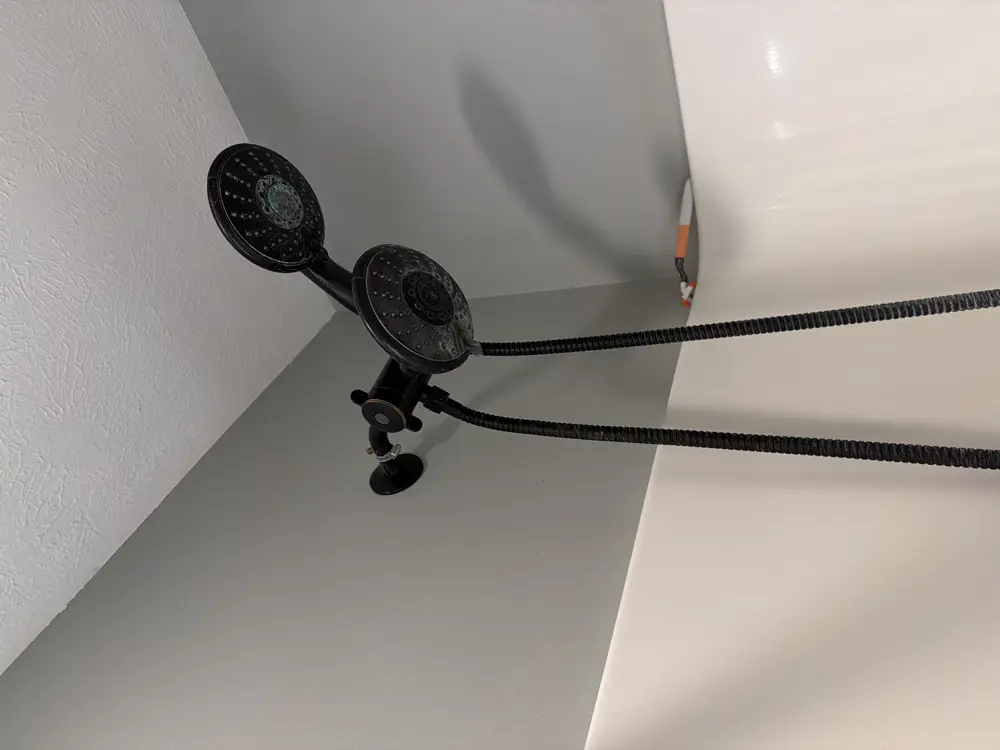
Heavy combo units put real strain on the arm. If your arm wiggles when you push on it, have the fitting behind the wall checked before you hang anything this size on it.
How much water can a shower head use?
This is the part most shoppers do not know about, and it explains why a new head can feel weaker than the old one.
Federal law caps every shower head sold in the US. Under the federal efficiency standard, 10 CFR 430.32, a shower head made after January 1, 1994 can use no more than 2.5 gallons per minute when tested at 80 pounds of water pressure.
The same rule says the flow restrictor inside has to be fixed in place firmly enough that it does not just fall out.
Michigan's plumbing code says the same thing. The fixture flow table in the Michigan Plumbing Code, chapter 6 lists a shower head at 2.5 gallons per minute at 80 psi, and it specifically counts a hand held shower spray as a shower head.
Many heads use even less. A head with the EPA WaterSense label uses no more than 2.0 gallons per minute, and the EPA requires those heads to pass spray force and coverage tests so they still feel like a real shower.
Here is what that means when you shop:
| Label on the box | Max flow | What to expect |
|---|---|---|
| Standard head | 2.5 gallons per minute | The most water any new head is allowed to use |
| WaterSense labeled | 2.0 gallons per minute | About 20 percent less water, tested for spray feel |
| Low flow or eco models | 1.5 to 1.8 gallons per minute | Noticeably lighter, saves the most hot water |
If your old head was installed decades ago, it may have been built before the 1994 limit and used more water than anything you can buy new. That is the most common reason a homeowner tells us the new head feels weaker. The head fits fine. It is simply designed to use less water.
The opposite also happens. A head with a high flow rating can empty a small water heater faster, so a long shower runs cold sooner than it used to.
Can I take the flow restrictor out to get more pressure?
You can physically pull it out of many heads, but we do not recommend it. It puts you over the federal and Michigan limits, it burns through hot water faster, and in our experience it rarely fixes the complaint people are actually having.
Most weak showers we see are not caused by a restrictor doing its job. They are caused by a restrictor or screen that is clogged with grit and mineral scale. Grand Rapids area water is hard, and small flakes of scale break loose from older pipes and lodge right at the head.
Rinse the screen and restrictor before you blame the head. If the flow is still weak with the head completely off the arm, the head was never the problem. Our full guide on how to increase water pressure in your shower covers that path step by step, including when it points to the valve or the pipes.
If scale keeps coming back every few months, it is worth looking at the water itself. A water softener slows that buildup across every fixture in the house, not just the shower.
How do I replace a shower head myself?
If your arm is solid and you are swapping one head for another, this is one of the easiest plumbing jobs in a house. Plan on ten to fifteen minutes.
You need the new head, a roll of thread seal tape (the thin white or blue tape sold next to plumbing fittings), a rag and possibly an adjustable wrench or pliers.
Step 1: Remove the old head. Turn the shower off. Grip the arm with one hand so it cannot turn, and with the other hand unscrew the head counterclockwise. If it will not budge, wrap a rag around the connection nut and use pliers gently, still holding the arm steady.
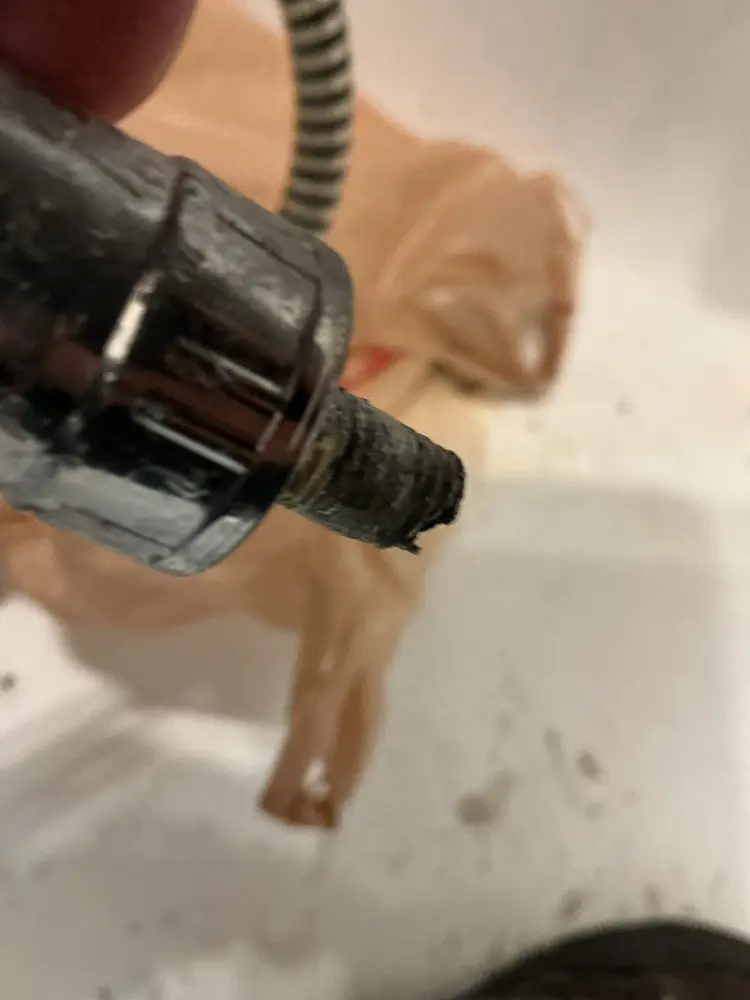
Threads that look like this are why an old head fights you coming off. Clean or replace parts this corroded, because a new head screwed onto crusty threads is the usual cause of a drip at the connection.
Step 2: Clean the arm threads. Peel off any old tape and wipe the threads with a rag. If there is mineral crust, scrub it with an old toothbrush and a little vinegar, then rinse. You want bare, clean threads before anything new goes on.
Step 3: Check the arm before you go further. Hold the arm and give it a gentle push up, down and sideways. It should not move or turn inside the wall.
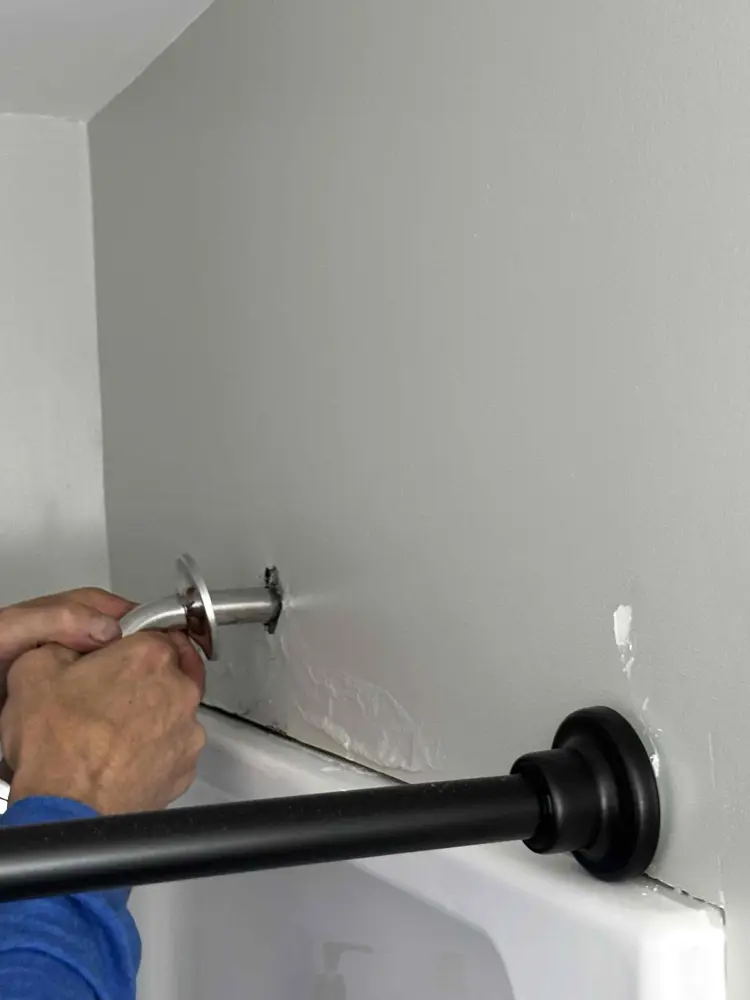
If the arm turns or wiggles like this one did, stop and fix the arm first. This home had a leak behind the wall at the arm. A new head would not have fixed it, and cranking on a loose arm can crack the fitting inside the wall.
Step 4: Wrap the threads with tape. Wrap the tape clockwise as you look at the end of the arm, two to three layers, starting at the end and working back.
Clockwise matters: it keeps the tape from bunching up as the head screws on. Many new heads include a rubber washer that does the sealing, but a thin wrap of tape still helps.
Step 5: Screw on the new head. Make sure the rubber washer is seated inside the head's connection nut. Thread the head on by hand, clockwise, until it is snug. If you use a wrench, wrap the nut with a rag first and add no more than about a quarter turn. Overtightening crushes the washer and causes leaks.
Step 6: Test it. Turn the shower on, hot and cold, and watch the connection for a minute.
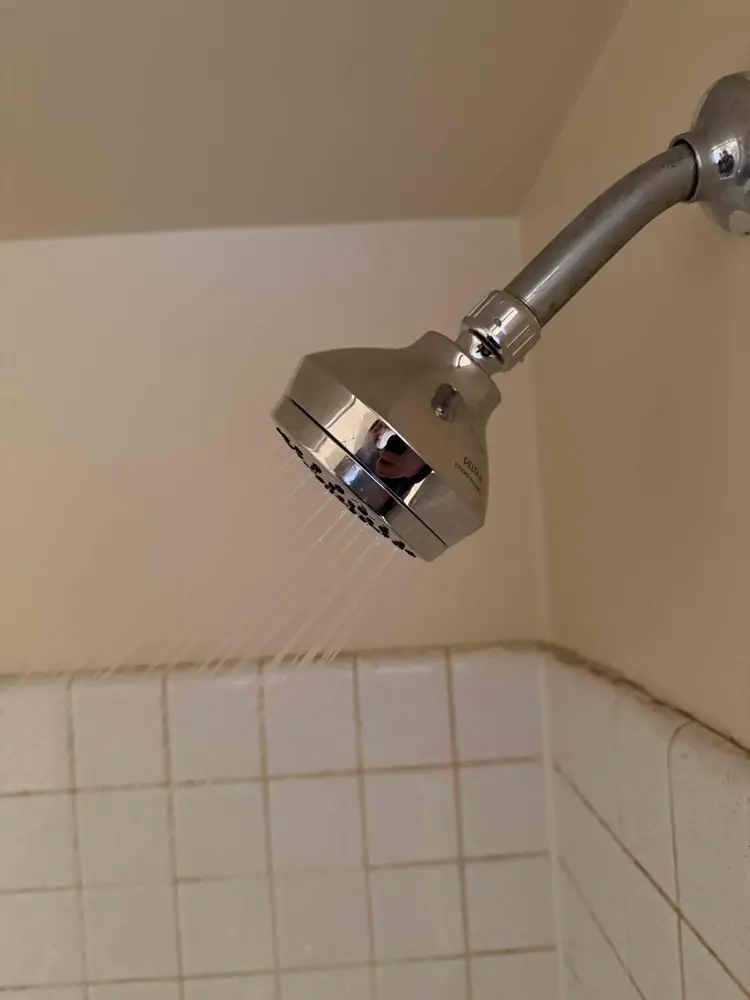
An even spray with no drip at the nut means you are done. If water beads or drips at the connection, turn the water off, snug the head another eighth of a turn and test again.
If it still drips after that, unscrew it, check that the washer did not fall out or fold over, rewrap the tape and try once more. That fixes almost every leak at a new head.
When is the problem not the shower head?
A lot of shower complaints get blamed on the head because it is the part you can see. Here are the signs that something else is going on, and what each one usually means.
Water keeps dripping from the head after you turn it off. A short dribble for a few seconds is normal, because water left in the arm drains out.
A steady drip that does not stop is almost always a worn part inside the shower valve called the cartridge, not the head. A new head will drip just like the old one did.
Water comes out of the tub spout and the head at the same time. That is the tub spout diverter, the pull up knob or lever that sends water up to the head. Our guide on how to fix a shower diverter that will not divert covers it.
Water stains or soft drywall on the other side of the shower wall. That points to a leak at the arm fitting inside the wall, which is what was happening at the home in the photos above. That needs the wall opened or accessed from behind, not a new head.
Low pressure at every faucet in the house, not just the shower. That is a supply problem. Old galvanized steel pipe, the gray threaded pipe common in older Grand Rapids homes, slowly closes up with rust and scale from the inside.
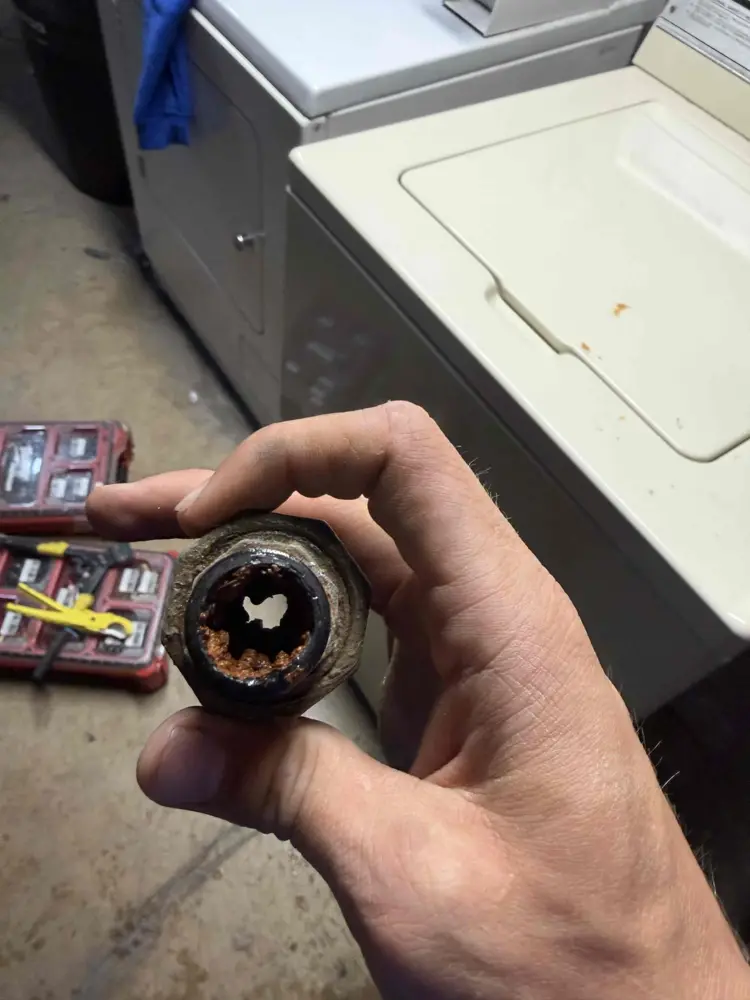
This is what weak pressure at every fixture often looks like from the inside. No shower head can push more water through an opening this small, and the fix is new pipe, not a new head. Our guide on how to increase water pressure in your house explains the options.
The temperature swings or the handle is stiff. Both point to the valve behind the handle. A head swap will not touch either.
When should I call a plumber instead?
Most head swaps do not need us, and we would rather tell you that than sell you a service call. Call a plumber when the job goes past the thread:
- The arm turns, wiggles or leaks where it enters the wall.
- The arm threads are cracked, or the arm snapped off inside the wall when you tried to remove the head.
- You want a ceiling mounted rain head, body sprays or a second head with its own controls. Those need new pipe and usually a new valve.
- You want a slide bar handheld and are not comfortable drilling into tile or a fiberglass surround.
- The head drips nonstop when it is off, which means the valve needs work.
- Pressure is weak at every faucet, not just the shower.
The Michigan code treats the valve and the pipe behind the wall as real plumbing, with rules in the fixtures chapter of the Michigan Plumbing Code for things like scald protection on shower valves.
That is the line where we come in. Our fixture installation service covers heads, handhelds, valves and trim when you want it done once and done right, and our plumbing repair service covers leaks at the arm and inside the wall.
Are all shower heads the same size?
The connection is the same on nearly every shower head sold in the US: a 1/2 inch thread that screws onto the shower arm. The faces are different sizes, from small fixed heads to 12 inch rain heads, but the part that attaches to the arm is standard.
Can you put any shower head on any shower?
Almost always, if the shower has a normal arm coming out of the wall. Fixed heads, handhelds with an arm mount, combo units and most rain heads screw right on. Ceiling mounted heads and body sprays are the exception, because they need new water lines behind the wall or ceiling.
What size is a standard shower arm thread?
Standard shower arms in US homes use a 1/2 inch pipe thread on the end where the head attaches. That is why new heads do not list sizes on the box. If your arm is unusual, such as an old clawfoot tub riser or an imported fixture, take the old head to the store to compare.
Why does my new shower head feel weaker than my old one?
New heads are limited to 2.5 gallons per minute by federal law, and WaterSense models use 2.0 or less. An older head may have used more. A clogged screen in the new head, or scale shaken loose during the swap, can also cut flow, so rinse the screen first.
Do I need thread tape on a shower head?
It helps. Many heads seal with a rubber washer inside the nut, but two or three clockwise wraps of thread seal tape on the arm threads make a leak much less likely. Never use pipe dope or glue on a shower head connection.
How tight should a shower head be?
Hand tight, then at most another quarter turn with a wrench wrapped in a rag. Overtightening crushes the rubber washer and is the most common cause of a new head dripping at the connection.
Can a handheld shower head be added to any shower?
Yes, if there is a standard arm. A diverter mount screws onto the arm and feeds both the fixed head and a hose. A wall mounted slide bar also works, but it needs holes drilled into tile or a surround, which takes more care.
Need a shower fixed or upgraded in West Michigan?
NSP Plumbing is a licensed Michigan plumbing contractor (license #8004990) based in Wyoming, Michigan. We swap heads and handhelds when you want it done for you, fix leaks at the shower arm, replace worn valve cartridges and install complete new valves and trim. See our fixture installation service and our shower and tub installation work.
We serve Grand Rapids, Wyoming, Kentwood and the surrounding towns. Have a question first? Contact us and a real person will answer.
Shower leaking or not working right?
Tell us what your shower is doing. A licensed NSP plumber will come out, find out whether it is the head, the arm or the valve, and give you the repair price before any work starts.