
Most outdoor faucets in West Michigan get replaced because of winter. One splits inside the wall, nobody notices until spring, and then water shows up in the basement. To replace an outdoor faucet, shut off the water, remove the old faucet, and install a frost free sillcock long enough to reach heated space, tilted slightly downhill.
How do you replace an outdoor faucet?
Replacing an outdoor faucet is a half day job for a handy homeowner and a short visit for a plumber. The work happens in two places: outside, where the faucet bolts to the wall, and inside, where its pipe connects to your water line. Most of the difficulty is on the inside.
Here is the order this guide follows:
- Shut off the water that feeds the faucet and drain the line.
- Remove the old faucet from the outside.
- Look at the opening in the wall from the inside.
- Measure the wall so you buy the right length.
- Connect the new faucet to the water line inside.
- Fasten it to the wall with a slight downward tilt and seal the opening.
- Turn the water on and test it, inside and out.
You will need a flashlight, a tape measure, a drill, a tube of exterior caulk, and the tools for whatever kind of pipe you have. Copper pipe joined with solder needs a torch. Plastic PEX tubing (the flexible red, blue or white water line in newer homes) needs a crimp or expansion tool, or push fittings.
The single most important choice is the faucet itself. If your old one froze, do not put the same part back. Replace it with a frost free model that is long enough for your wall, which we explain in the next two sections.
What is the difference between a standard outdoor faucet and a frost free sillcock?
Plumbers use three names for the same fixture: hose bib, spigot and sillcock. What matters is where the valve inside it actually stops the water.
On a standard outdoor faucet, the valve sits right behind the handle, outside the wall. Here is a typical one on a West Michigan home.
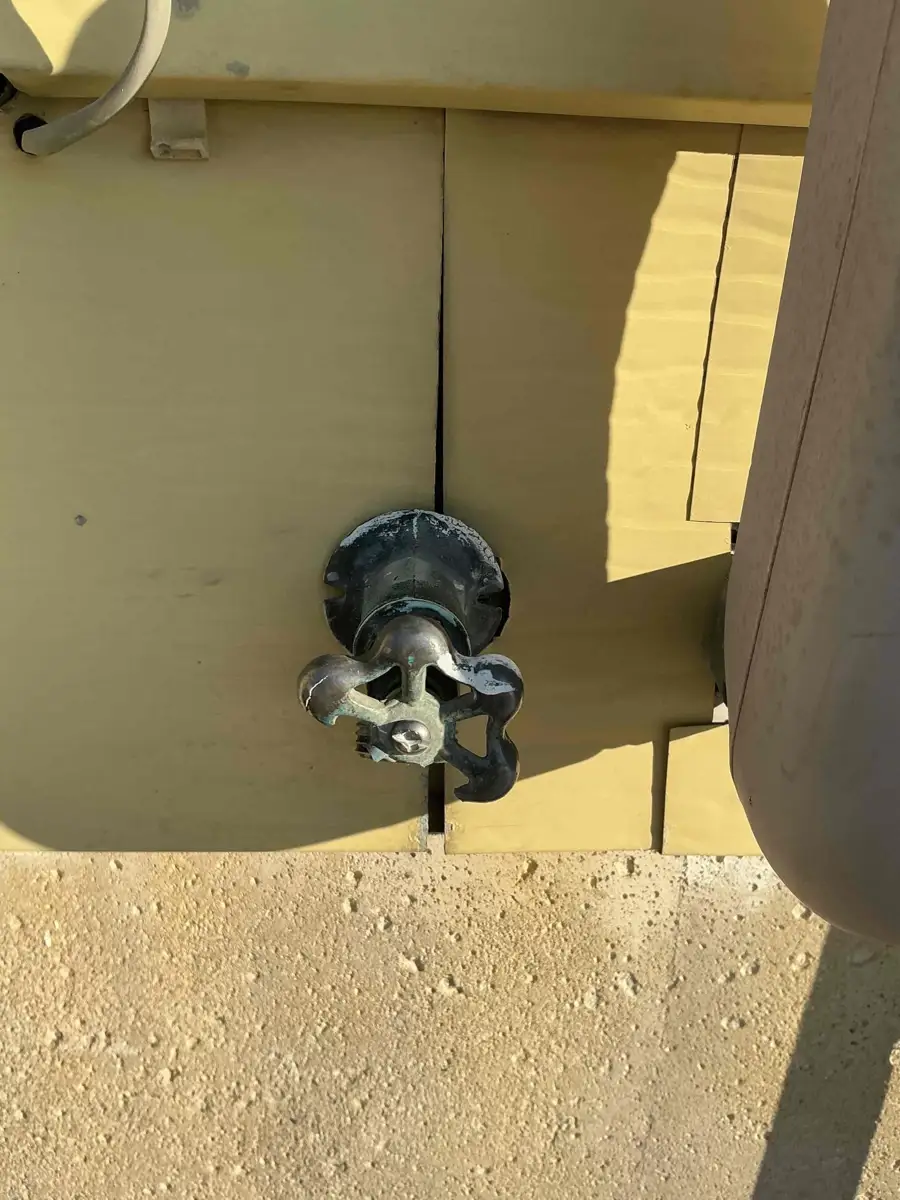
This is a standard outdoor faucet, and it is the kind that splits in a Michigan winter. The pipe behind it stays full of water right up to the outside wall. If nobody shuts it off and drains it from inside every fall, that water freezes, expands, and cracks the pipe.
A frost free sillcock looks similar from the outside, but the valve is at the far end of a long tube, a foot or more inside the house where it stays warm. When you turn the handle off, the water stops inside, and the tube between the valve and the spout drains itself out the front.
Frost free models come in lengths, commonly from about 4 inches to 14 inches or more. Most also include a vacuum breaker, the small cap on top that stops dirty hose water from being pulled back into your drinking water.
The third term you may see is anti siphon, which just means the faucet has that vacuum breaker built in. Michigan's plumbing code requires backflow protection on hose connections, covered in Chapter 6 of the Michigan plumbing code on UpCodes. A frost free sillcock with a built in vacuum breaker checks both boxes in one part.
How do I know if my outdoor faucet needs replacing and not just a washer?
Not every leaky outdoor faucet needs to come out. A drip from the spout when it is fully off, or a little water around the handle stem, is often a worn washer or packing. Those are small repairs, and on a frost free model a new stem cartridge often fixes it.
Replacement is the right call when any of these are true:
- Water shows up inside when the hose runs. That almost always means the pipe or tube cracked inside the wall during a freeze. Replacing a washer will not help.
- The faucet body is cracked or bulged. You can sometimes see a split in the brass or a pipe that looks swollen behind the flange.
- It is a standard faucet that has frozen once. It will freeze again. Swap it for a frost free one.
- The handle spins or the stem is stripped. Parts for older faucets are often not worth chasing.
Our guide on how to winterize an outdoor faucet covers diagnosing a frost free faucet that leaks after winter. If you are not sure whether water is getting into the wall, our guide on how to tell if a pipe burst walks through the signs to look for.
On our own calls, spring is when most split faucets get found. Outdoor faucet work picks up sharply from April through June, when people turn the water back on for the first time since fall. If you can replace a damaged faucet before then, you avoid finding the leak the hard way.
Step by step: how to replace an outdoor faucet
Each step below has a real photo from an NSP job. Go slowly on the inside steps. That is where small mistakes turn into wet ceilings.
Step 1: Shut off the water and drain the line. Find the valve inside the house on the pipe that runs to the faucet. In a basement home, stand directly behind where the faucet sits outside and follow the pipes along the ceiling near the foundation wall.
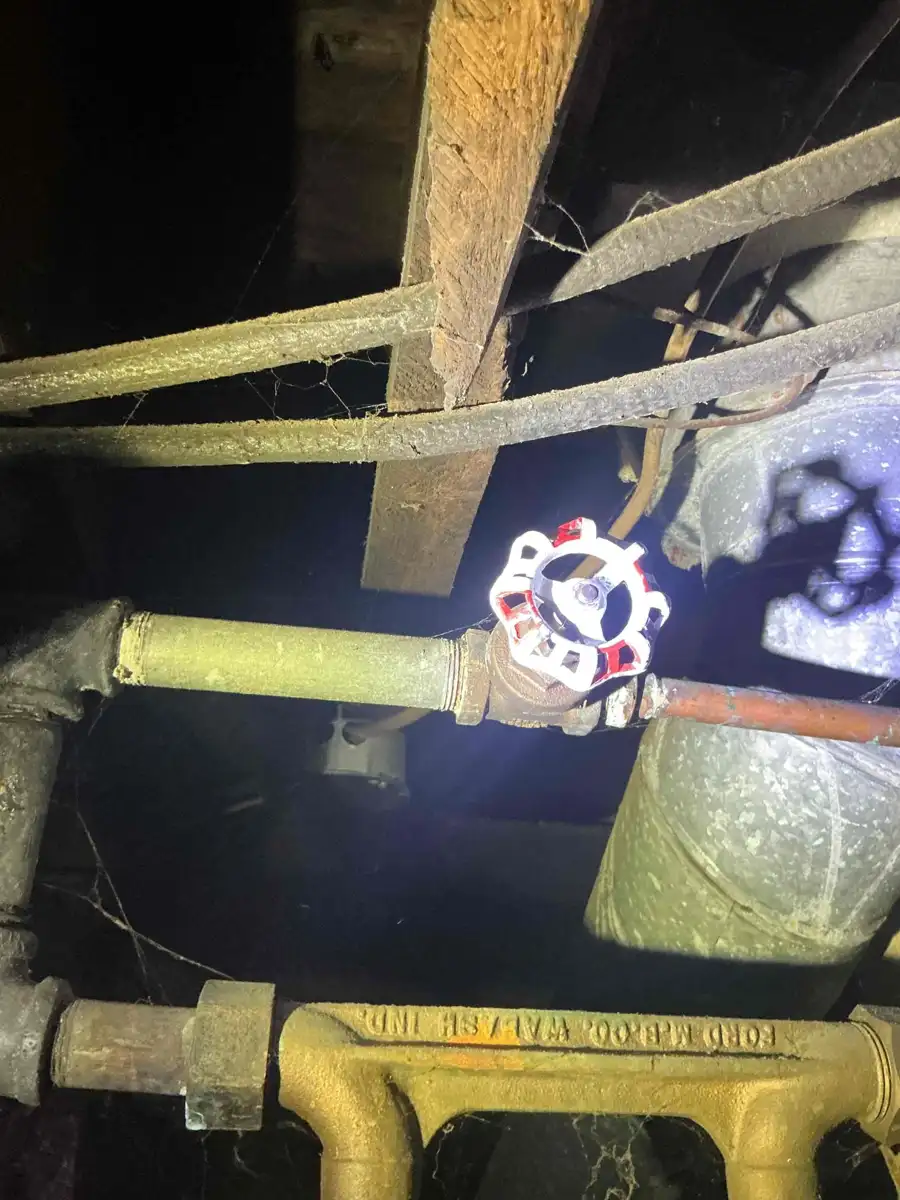
A round handle valve like this one closes clockwise, and it is the first thing to find before any tool comes out. Turn it slowly. If it will not close all the way or starts dripping from the stem, the valve itself needs replacing too.
If there is no separate valve, shut off the main. Our guide to finding your main water shutoff valve explains where it hides. Then open the outside faucet and let the line drain.
Step 2: Remove the old faucet. Take out the screws holding the flange to the wall, then pull. Some faucets slide straight out. Others are soldered or threaded to the pipe inside, so you have to disconnect them from inside first.
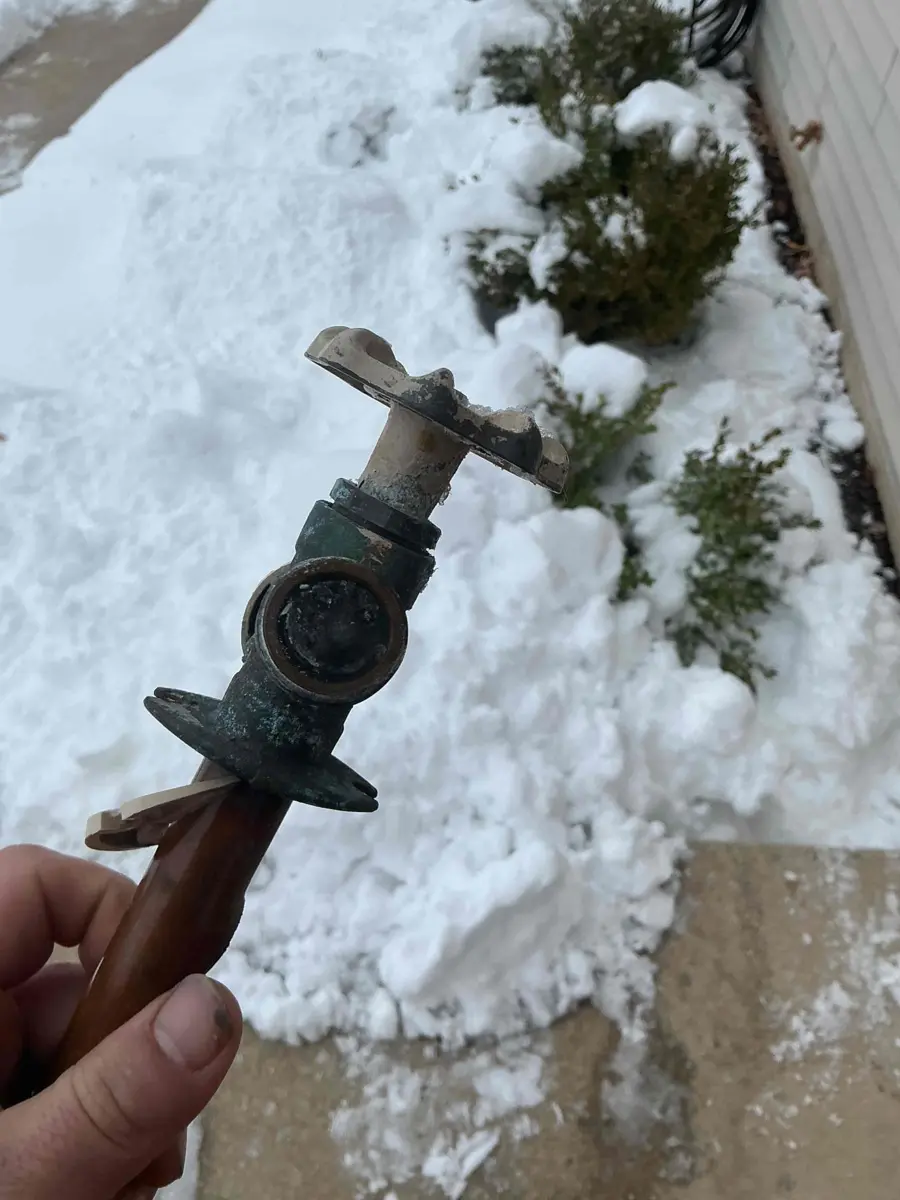
This old faucet came out in one piece with its pipe still attached, which made this job a straight swap. Look at the pipe that comes out with it. A frost free faucet that comes out long and intact usually just needs a new unit of the same length or slightly longer.
Here is the back end of the same faucet. Look closely at the copper pipe behind the valve.
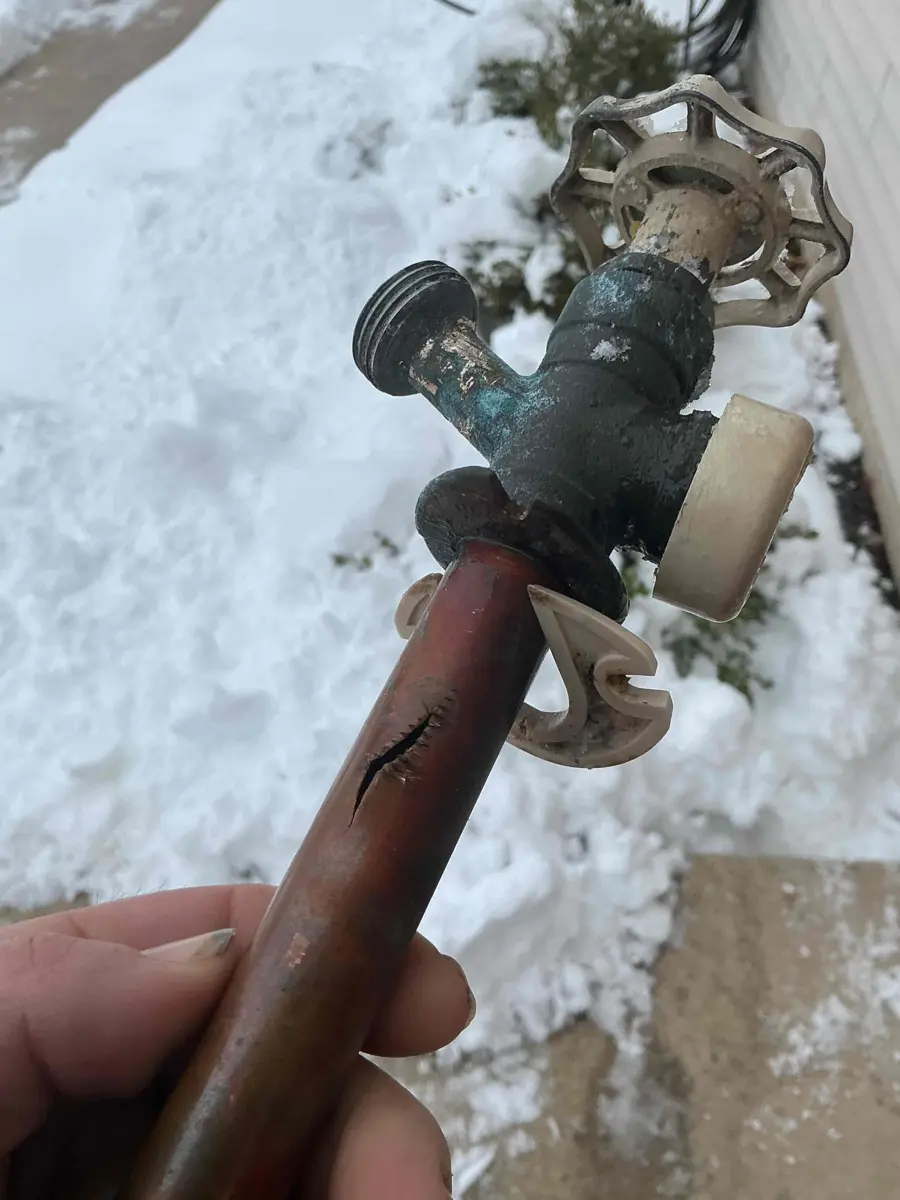
Look for a crack or bulge in the copper behind the valve, because that means the old faucet froze and should not be reused. If you find one, plan for a frost free replacement long enough that the new valve sits inside the heated part of the house.
Step 3: Check the opening from the inside. With the old faucet out, go back inside and look at where the pipe passes through the rim joist, the wooden board that sits on top of the foundation wall.
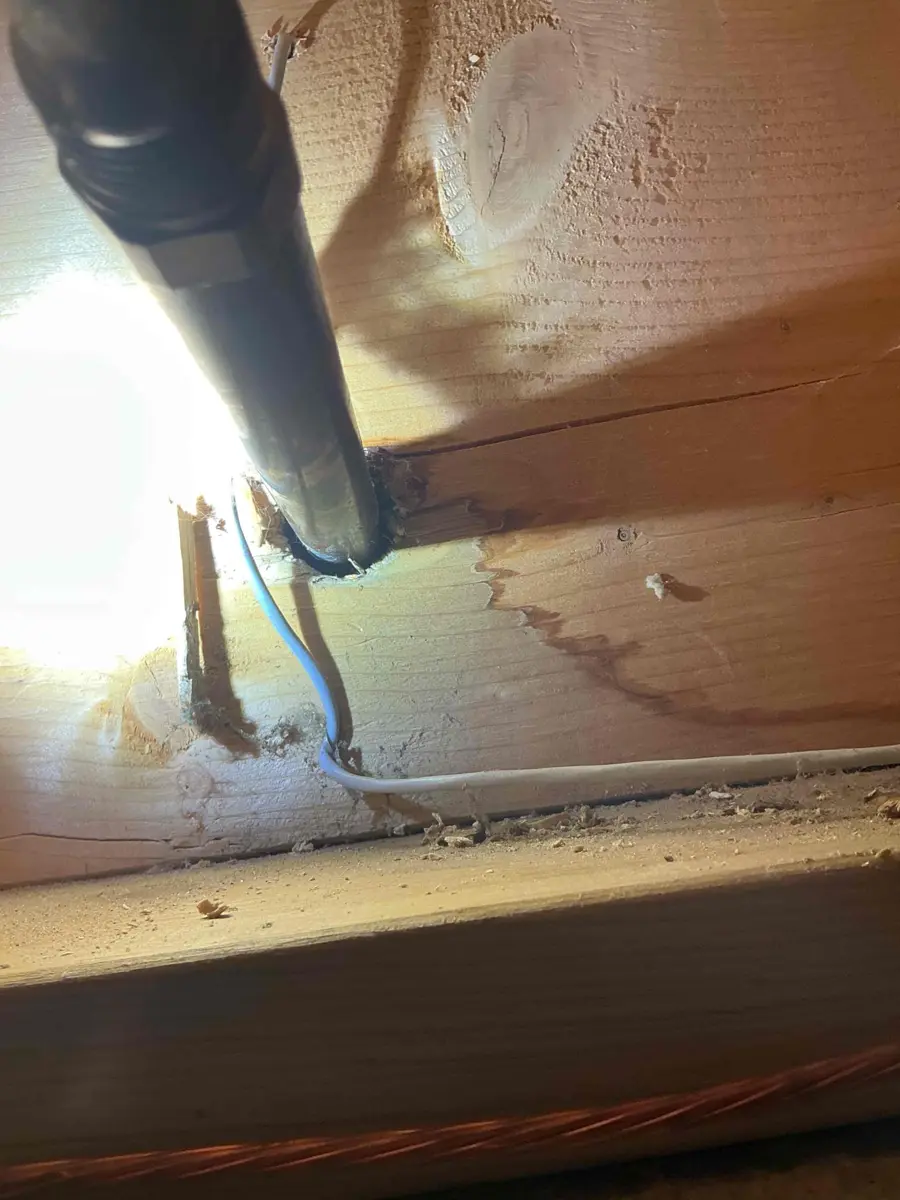
This is where you check for soft wood and cold drafts before the new faucet goes in. Push on the wood around the hole. If it is soft or crumbly, a slow leak has been rotting it, and that board needs repair first. If you feel cold air, that gap is part of why the old faucet froze.
Step 4: Measure the wall so you buy the right length. Measure from the outside face of the siding to the point inside where the new valve will connect to your water line. Then add a little room so the valve sits well inside the heated space.
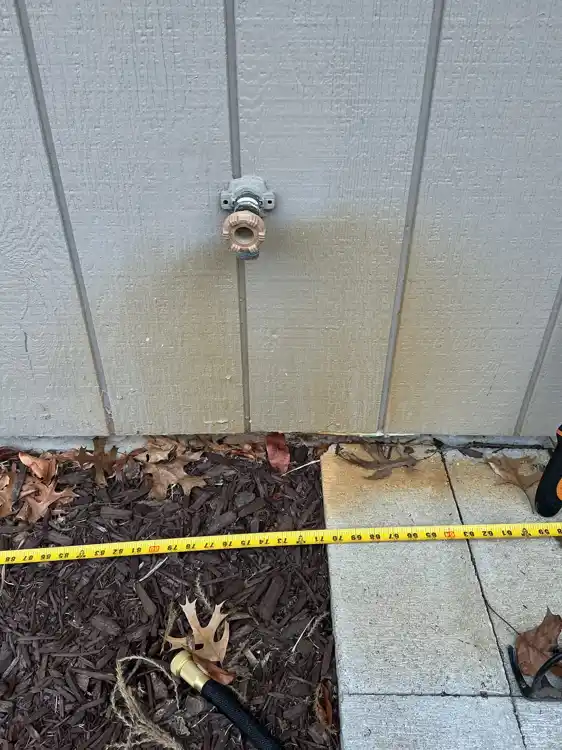
Measure first and buy second, because a frost free faucet that is too short freezes just like a standard one. Common lengths run from 8 to 12 inches. Thick brick walls, basements with paneling over the joists, and faucets that pass behind a fireplace or a chimney can need 14 inches or more.
Step 5: Connect the new faucet to the water line inside. This is the part that takes skill. Slide the new faucet through the wall.
Then join its inlet to your water line with fittings that match your pipe. While you are in there, it is smart to add a dedicated shutoff for this faucet if it did not have one.
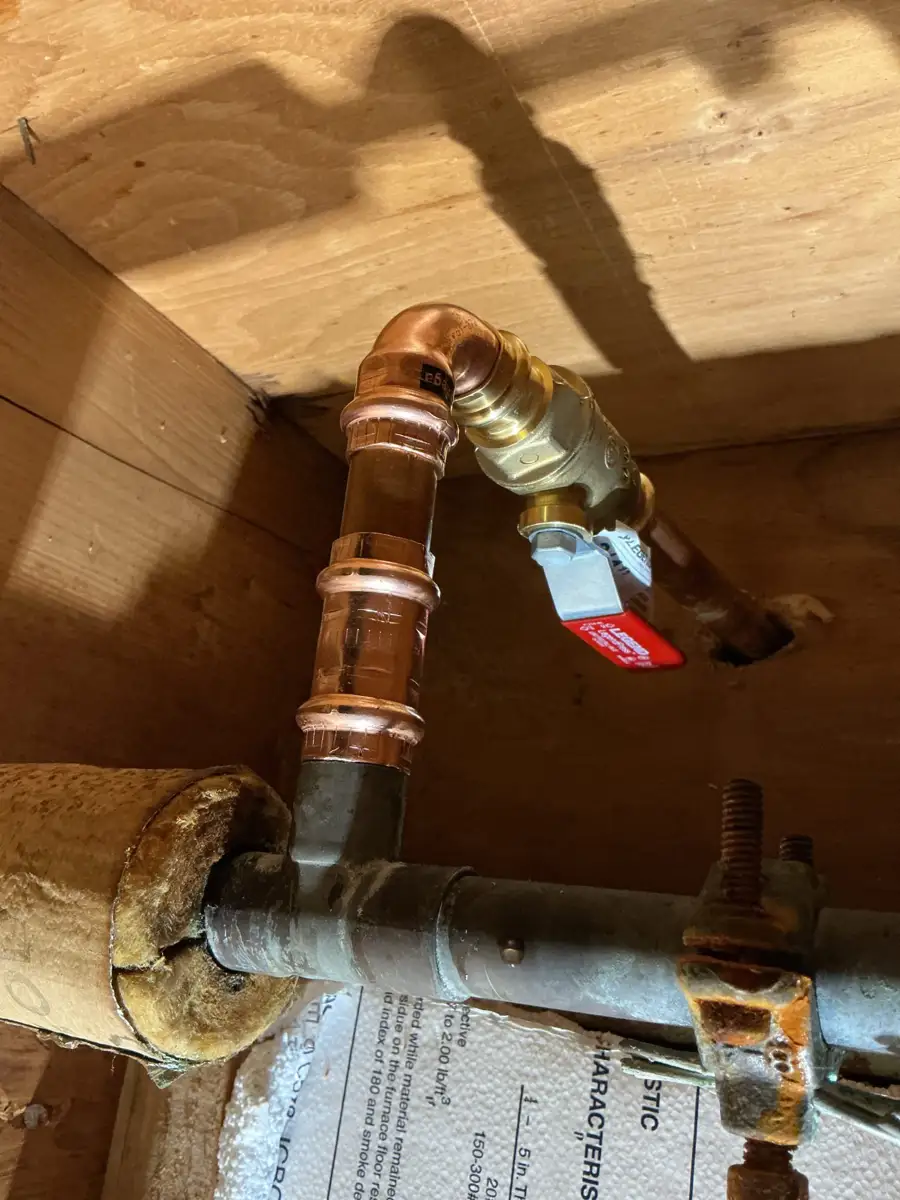
A dedicated quarter turn shutoff like this one is what makes the next repair a five minute job. A quarter turn valve opens and closes with a lever that moves a quarter of a circle. When we replace an outdoor faucet and there is no separate valve, adding one is usually part of our recommendation.
On copper, the connection is either soldered with a torch or made with press or push fittings. Soldering right next to wood framing calls for a heat shield and real care. If the pipe runs above a finished ceiling, this step usually means cutting an access hole.
Step 6: Fasten the faucet with a slight downward tilt and seal the wall. Before you tighten the mounting screws, check that the spout end is a little lower than the inside end. That tilt is what lets the tube drain after you shut it off. Then caulk around the flange so rain cannot run behind the siding.
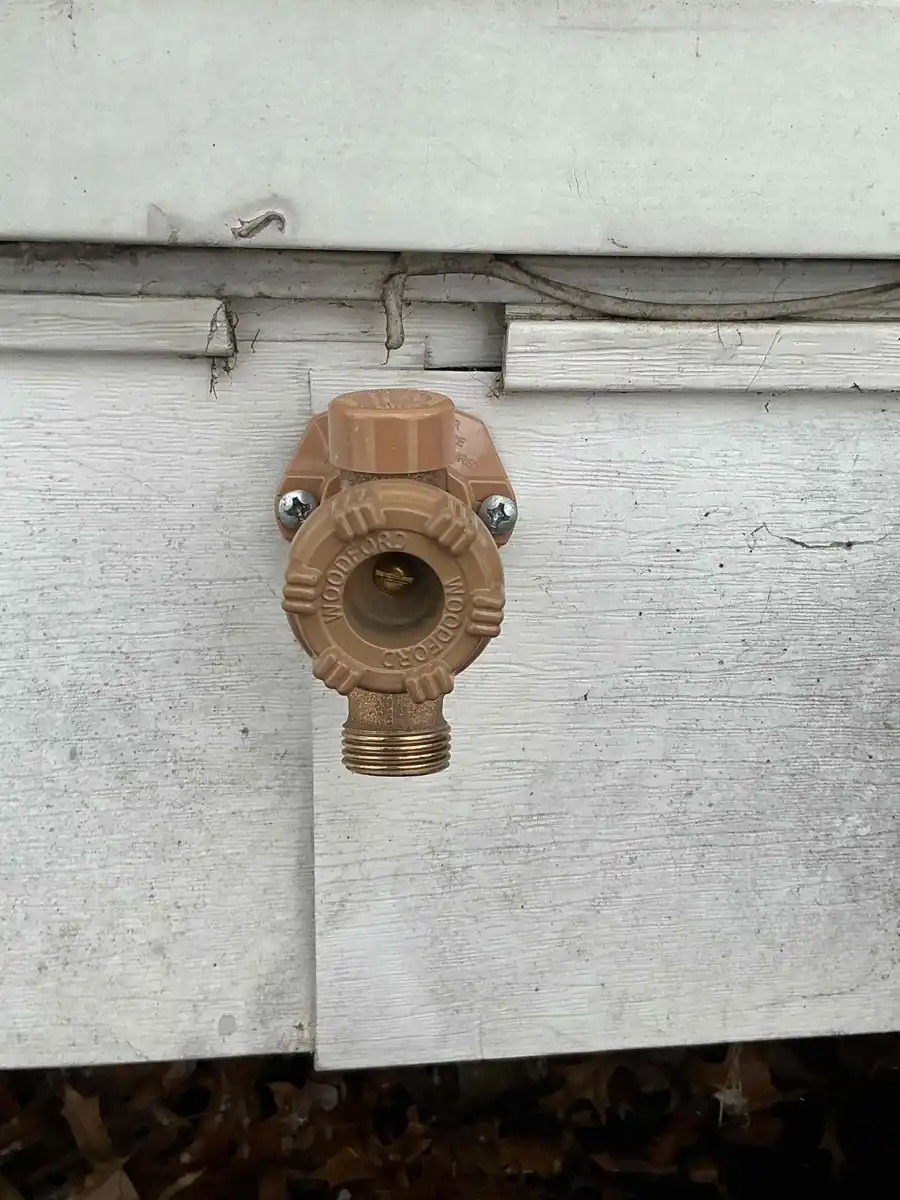
This new frost free sillcock sits flush to the siding with the spout pointing slightly down, which is how it drains itself every time it is shut off. This one replaced a faucet that kept freezing. The longer tube now reaches into the heated part of the basement.
Step 7: Turn the water on and test it. Open the inside valve slowly. Go inside first and watch your new connection for a minute. Then open the outside faucet all the way.
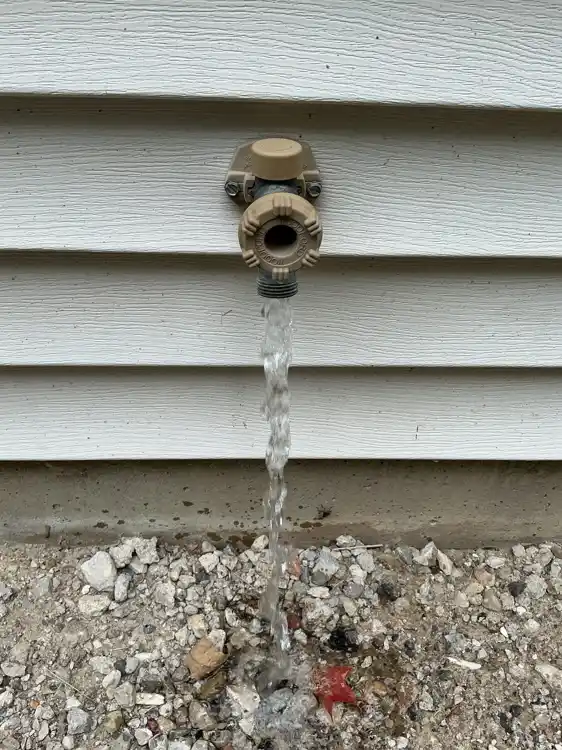
A strong, steady stream outside and a dry connection inside means the job is done. Shut the faucet off and watch the spout. You should see a short trickle as the tube drains. Check inside once more an hour later. A slow seep at a new joint sometimes takes a while to show. Once it is working, the EPA WaterSense outdoor water use page has neutral tips on watering without waste.
Why do new frost free faucets still split in the first winter?
We replace frost free faucets that froze, and the cause is nearly always one of three things. All three are avoidable during installation or in the first fall.
A hose was left attached. A frost free faucet drains out the front. A hose screwed onto it traps water in the tube, and that water freezes inside the wall. This is the most common cause by a wide margin. Take the hose off every fall, along with splitters and timers.
It was installed tilted back toward the house. If the inside end sits lower than the spout, water pools in the tube instead of draining out. Use a small level when you fasten the flange.
The tube is too short. If the valve sits inside the rim joist instead of past it, it is still in the cold. On a basement home, the valve should end up past the foundation wall and the insulation, where the air is warm in winter.
A fourth cause is cold air pouring in around the pipe. Sealing the gap around the faucet from inside with spray foam or caulk helps. Do not pack insulation so tightly that the warm basement air can no longer reach the valve end.
If your faucet will be exposed to a cold snap right after installation, the National Weather Service winter safety page is a good place to watch for extreme cold forecasts. A few minutes of prep before a hard freeze saves a new faucet.
When should you call a plumber to replace an outdoor faucet?
Plenty of homeowners replace their own outdoor faucet, and on a simple straight swap it is very doable. These situations change the math:
- The pipe runs above a finished ceiling. Reaching the connection means cutting drywall, making the joint, and patching it. A plumber can usually do this with a small, neat opening.
- There is no inside shutoff for the faucet. Adding one is the right fix. It means working on a live water line with the main off, which raises the stakes.
- You have old galvanized steel pipe. Galvanized is gray threaded pipe common in older Grand Rapids homes. It often cracks or strips when you try to unthread it, and one faucet replacement can turn into a short section of repiping.
- The faucet passes behind a fireplace, a deck, or a finished wall with no access. These need planning before anything gets cut.
- The rim joist is soft or rotted. The leak has been going on for a while. The wood needs attention, and it is worth checking for hidden water damage around it.
- Water was getting into the wall. A split faucet can soak insulation and framing before you see it. Our leak detection service can confirm where the water went.
If the faucet froze and broke during a cold snap, close the inside valve first. Then see our guide on how to unfreeze pipes if other lines might be frozen too, and call. Our frozen pipe repair team handles split faucets all winter.
A lawn sprinkler line that tees off near the faucet is its own job. Sprinkler backflow devices often need yearly testing, which our backflow testing service covers.
How long does it take to replace an outdoor faucet?
A straight swap with good access inside is usually a short visit for a plumber. It takes longer when the connection is above a finished ceiling, when an inside shutoff needs to be added, or when old galvanized pipe has to be replaced. A first time homeowner should plan on most of an afternoon.
What length frost free faucet do I need?
Measure from the outside face of the siding to where the faucet will connect inside, then choose a length that puts the valve past the rim joist and insulation into heated space. Common lengths run 8 to 12 inches. Brick walls and faucets that pass behind a fireplace often need 14 inches or more.
Can I replace a standard outdoor faucet with a frost free one?
Yes, and in Michigan it is the right upgrade. The connection point inside usually has to move further into the house, because a frost free faucet is longer. That can mean cutting the pipe back and adding a fitting, which is why measuring first matters.
Do I need to shut off the main water to replace an outdoor faucet?
Only if the faucet does not have its own shutoff valve inside. If there is a dedicated valve on that line, close it and drain the faucet. If there is not, shut off the main for the job and consider adding a dedicated valve while the water is already off.
Why is water leaking inside my house when I use the outdoor faucet?
That usually means the pipe or the tube of a frost free faucet cracked inside the wall during a freeze. The water leaks out at the split instead of reaching the spout. Close the inside valve right away and replace the faucet. A new washer will not fix a split.
Which way should an outdoor faucet slope?
The spout end should sit slightly lower than the inside end so water drains out after you shut it off. A frost free faucet that tilts back toward the house holds water in its tube and can freeze even with the hose removed.
Is a frost free faucet the same as an anti siphon faucet?
Not exactly. Frost free describes where the valve sits, deep inside the warm part of the house. Anti siphon means it has a vacuum breaker that stops hose water from being pulled back into your drinking water. Most frost free sillcocks sold today are both.
Outdoor faucet replacement from NSP Plumbing
NSP Plumbing is a licensed Michigan plumbing contractor, license #8004990, based in Wyoming, Michigan. We replace standard and frost free outdoor faucets, add dedicated shutoff valves, and repair split pipes inside walls for homeowners in Grand Rapids, Wyoming, Kentwood, Grandville, Jenison, Byron Center, Caledonia, Ada, Rockford, Walker and Hudsonville.
If your faucet froze, leaks inside, or just keeps giving you trouble every spring, our plumbing repair service handles it. A licensed plumber will look at the wall, the pipe and the shutoff, tell you what it actually needs, and give you a written price before any work starts.
If you would rather do it yourself, use this guide, measure twice, and take the hose off before the first freeze. If something does not look right once the old faucet is out, you can always contact us.
Get your outdoor faucet replaced before the next freeze
A licensed NSP plumber checks the faucet, the pipe inside the wall and the shutoff valve, then gives you a written price before any work starts.